Oriented Imagery in ArcGIS Pro: Create & Publish to ArcGIS Online
Unlock the power of geospatial analysis! Discover how to create and publish Oriented Imagery Datasets in ArcGIS Pro and ArcGIS Online with this easy-to-follow guide. Perfect for showcasing your imagery like a pro!
Resources Needed
- ArcGIS Pro (Standard or Advanced)
- ArcGIS Online Organizational Account
- Imagery data for your dataset
To create and publish an Oriented Imagery Dataset, follow these steps:
- Prepare Your Data
- Ensure your imagery data is properly formatted and georeferenced.
- Organize your imagery files in a structured folder system for easy access.
2. Create a New Project in ArcGIS Pro
- Open ArcGIS Pro.
- Create a new project or open an existing one.
- Ensure you are signed in with your ArcGIS Online Organizational Account.
3. Create an Oriented Imagery Dataset
-
- Go to the “Analysis” tab and select “Tools”.
- In the Geoprocessing pane, search for the “Create Oriented Imagery Dataset” tool.
- Input the necessary parameters, including the location of your imagery data and the desired output location for the OID.
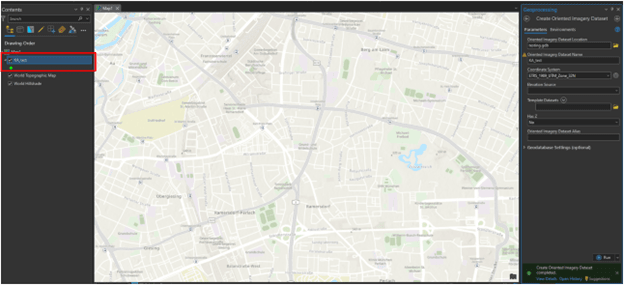
Oriented Imagery Dataset feature class created from the “Create Oriented Imagery Dataset” geoprocessing tool.
4. Add Images to the Oriented Imagery Dataset
-
- Use the “Add Images to Oriented Imagery Dataset” tool from the Geoprocessing pane.
- If the images are going to be viewed only in ArcGIS Pro, you can add a folder with the images.
- If the dataset is going to be published to ArcGIS Online, input a CSV file with the following fields: X, Y, Spatial Reference System, Image Path, Camera Heading, Pitch, Roll, Height. To add orientation information such as Omega, Phi, Kappa, the extra field should follow this schema: 2|H_WKID|V_WKID|X|Y|Z|RA1|RA2|RA3.

Example of how the images need to be formatted in a CSV file before being added to the Oriented Imagery Dataset and published to ArcGIS Online.

Result after adding the images using the CSV file to the Oriented Imagery Dataset feature class.
5. Build Oriented Imagery Footprint
-
- Use the “Build Oriented Imagery Footprint” tool from the Geoprocessing pane.
- This step generates footprints for each image, which are essential for knowing the location and extent of the images.
- Input parameters include the Oriented Imagery Dataset, a reference DEM if available, and an output feature class for the footprints.
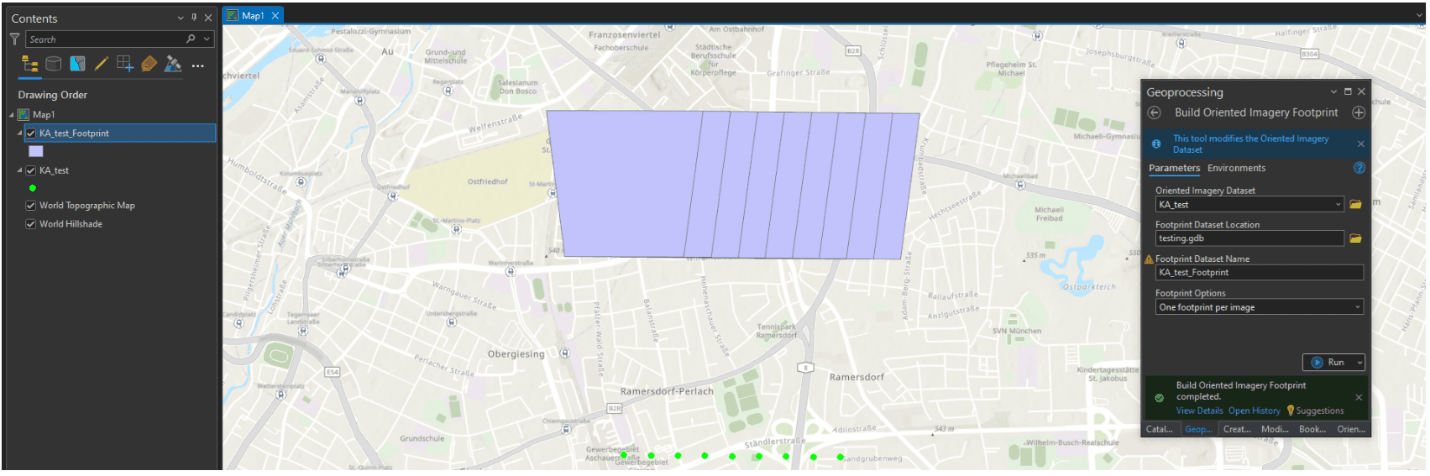
Imagery footprints output
6. Generate Service from Oriented Imagery Dataset
-
- Use the “Generate Service from Oriented Imagery Dataset” tool from the Geoprocessing pane.
- Input parameters include the Oriented Imagery Dataset and the desired output service name.
- Specify the portal connection where the service will be published.
- Configure additional parameters such as service description, summary, and tags.
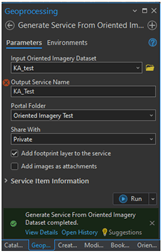
Parameters used before publishing the service to ArcGIS Online.
7. Verify the Published Dataset
-
- Log in to your ArcGIS Online account.
- Navigate to the Content page and locate the published OID.
- Open the item to ensure all images and metadata are correctly displayed.
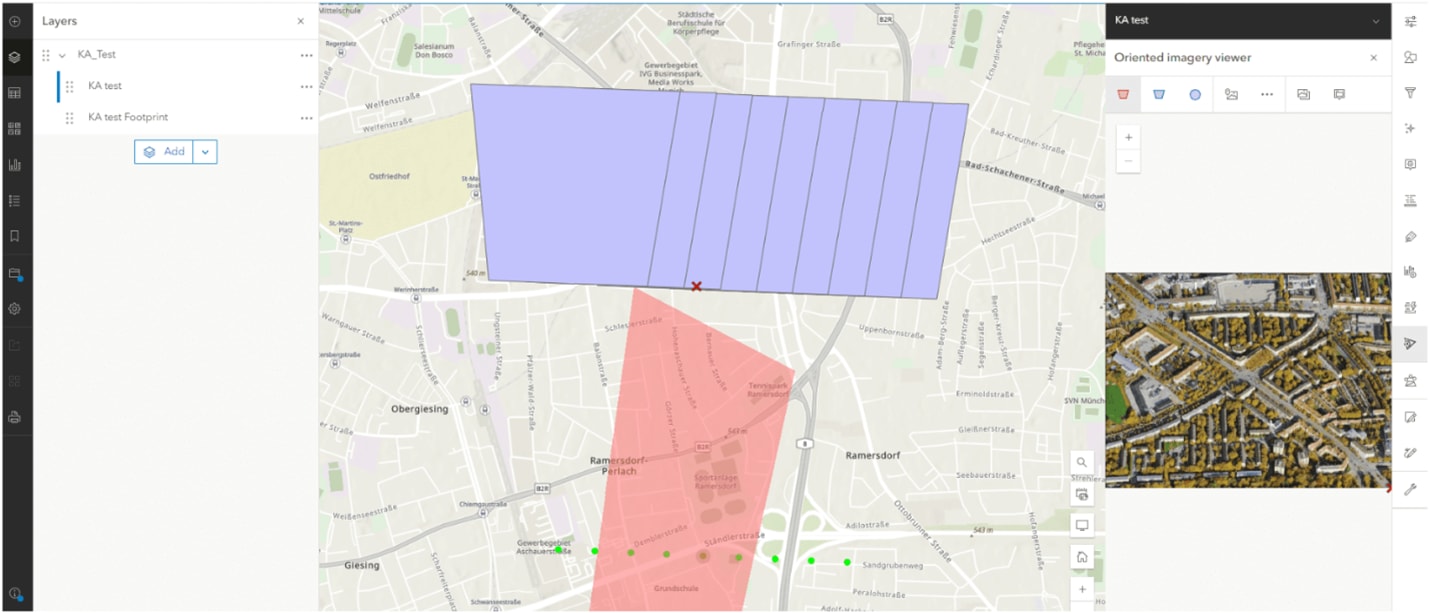
Oriented Imagery service viewed using ArcGIS Online’s Map Viewer.
By following these steps, you should be able to successfully create and publish an Oriented Imagery Dataset in ArcGIS Pro and make it available in ArcGIS Online for further use and analysis.