ArcGIS Hub: configurable catalogs crash course
ArcGIS Hub Catalogs just got a huge upgrade. Say hello to configurable catalogs, the latest way to organize and customize your catalog content. With flexible filtering and custom collections, it’s now easier than ever for users to search and discover content.
Introduction
In November 2025, ArcGIS Hub released an update that allows users to configure catalog collections. Catalog collections allow you to create custom groupings within a catalog. Previously you were limited to pre-configured collections for Sites, Data, Documents and Apps & Maps. The ability to configure catalog collections is automatically available for all Hub Sites created after November 8th, 2025. To enable this ability for older Hub sites, you will need to upgrade the site catalog.
Catalog collections
With the new catalog collections, you can take content organization within your Hub site to the next level. Catalog collections allow you to organize your content into subsets, making content browsing and discovery easier for your users. For ArcGIS Hub Basic users, you can configure up to 4 collections per Hub site. ArcGIS Hub Premium users can configure up to 10 unique collections per Hub site.
When setting the filters for your collection you can choose from the following options:
-
Manual selection
-
Created date
-
Modified date
-
Type
-
Sharing
-
Categories
-
Tags
-
Organization
For ArcGIS Hub Basic users, you can set one filter per collection but for ArcGIS Premium users you are able to set as many filters as you would like. Before you start configuring your collections, you need to have a catalog first.
Build a catalog
If you did not set up a catalog when making your ArcGIS Hub Site, you are able to configure it from the catalog Contents page.
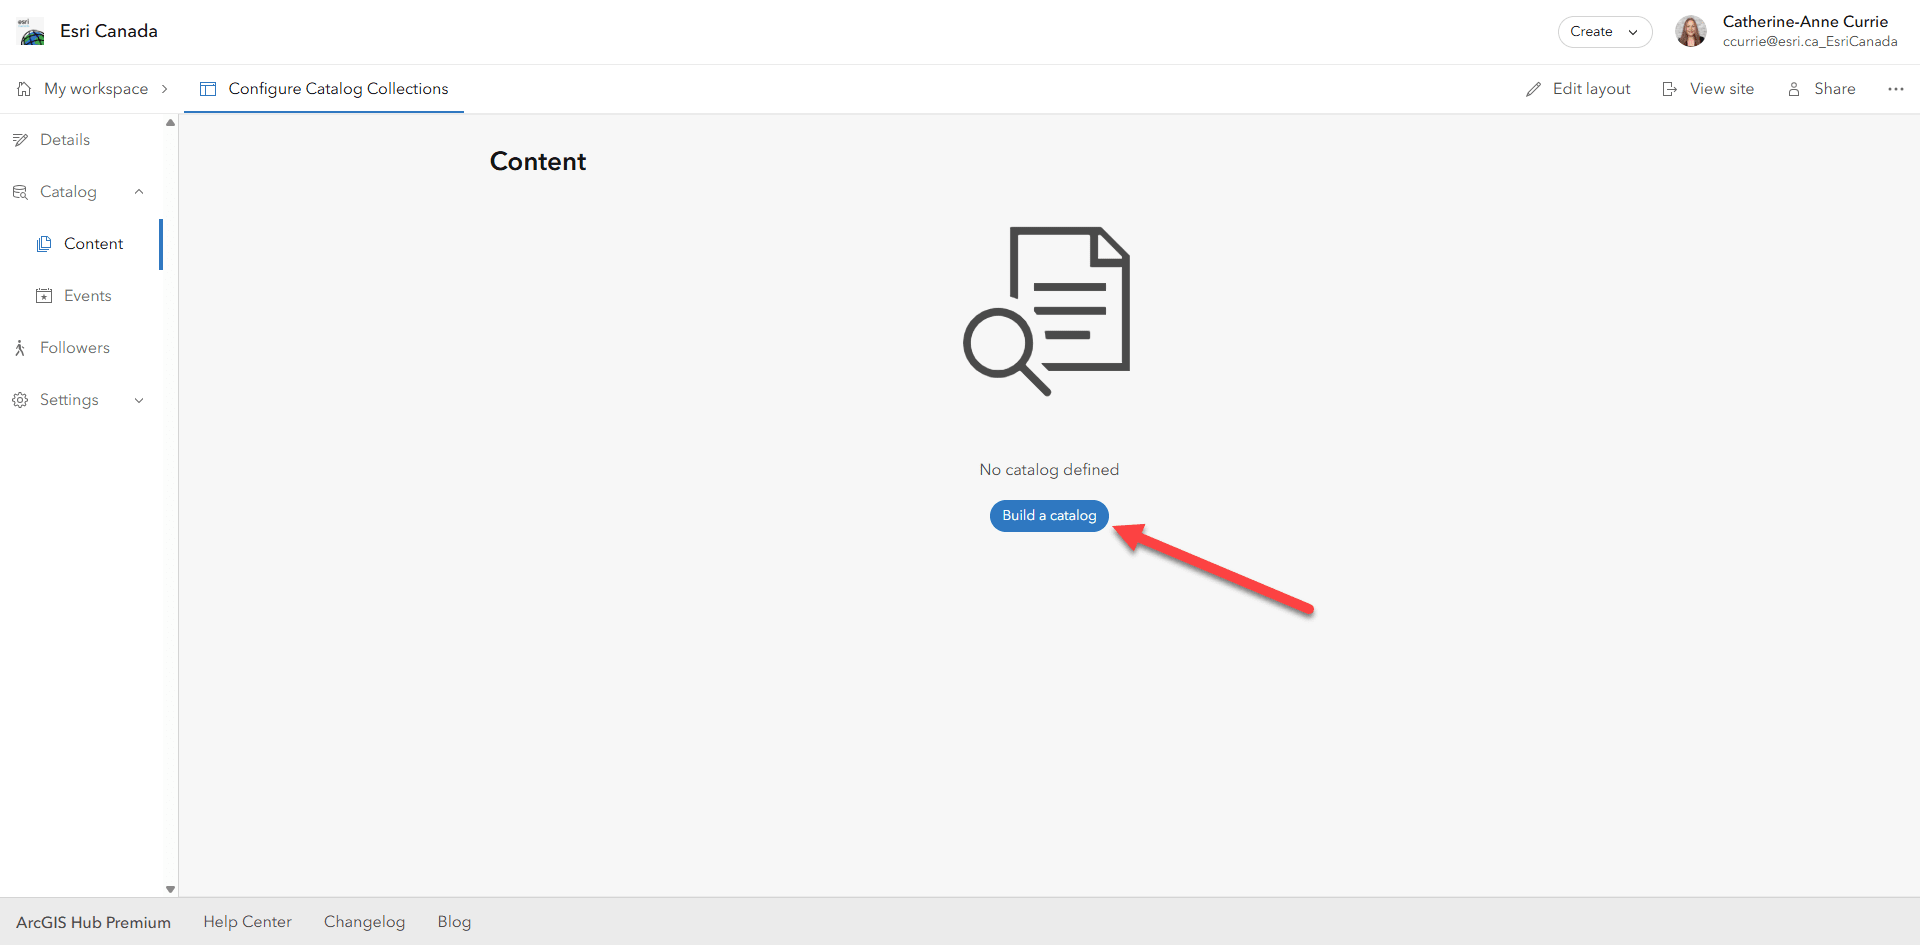
Build a Catalog button
To access this page, you just need to click the manage button beside your desired Hub site on your workspace overview page.

Select to manage your Hub site
Next you will click on “Select groups” and then you can go ahead choose the groups that you would like to be included in your catalog. You can include as many groups as you would like within your catalog for both ArcGIS Hub Basic and ArcGIS Hub Premium.
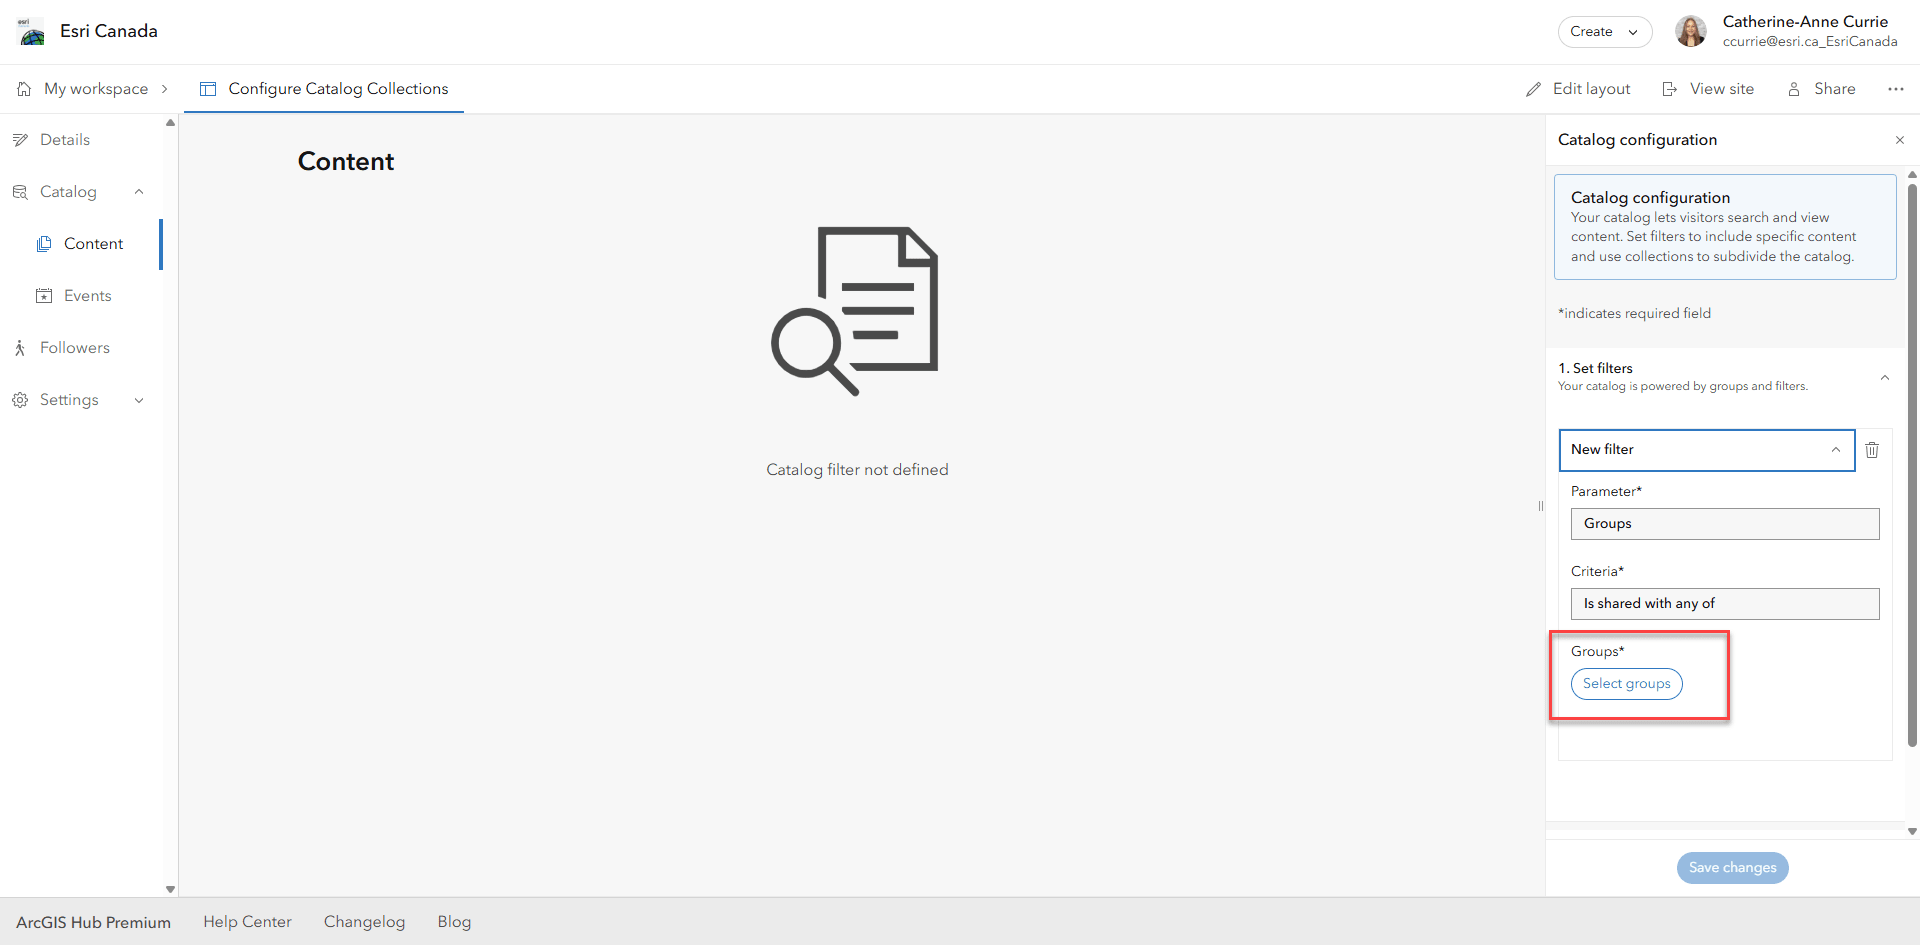
Click on the “Select groups” button to choose groups for your catalog
Once you have chosen the groups you would like in your catalog, you will see that the content from these groups is shown within the catalogs preview. As you make changes to your catalog and its collections, you will see all changes automatically reflected. This makes creating an intuitive user experience easier than ever as you can see and interact with the changes as you make them.
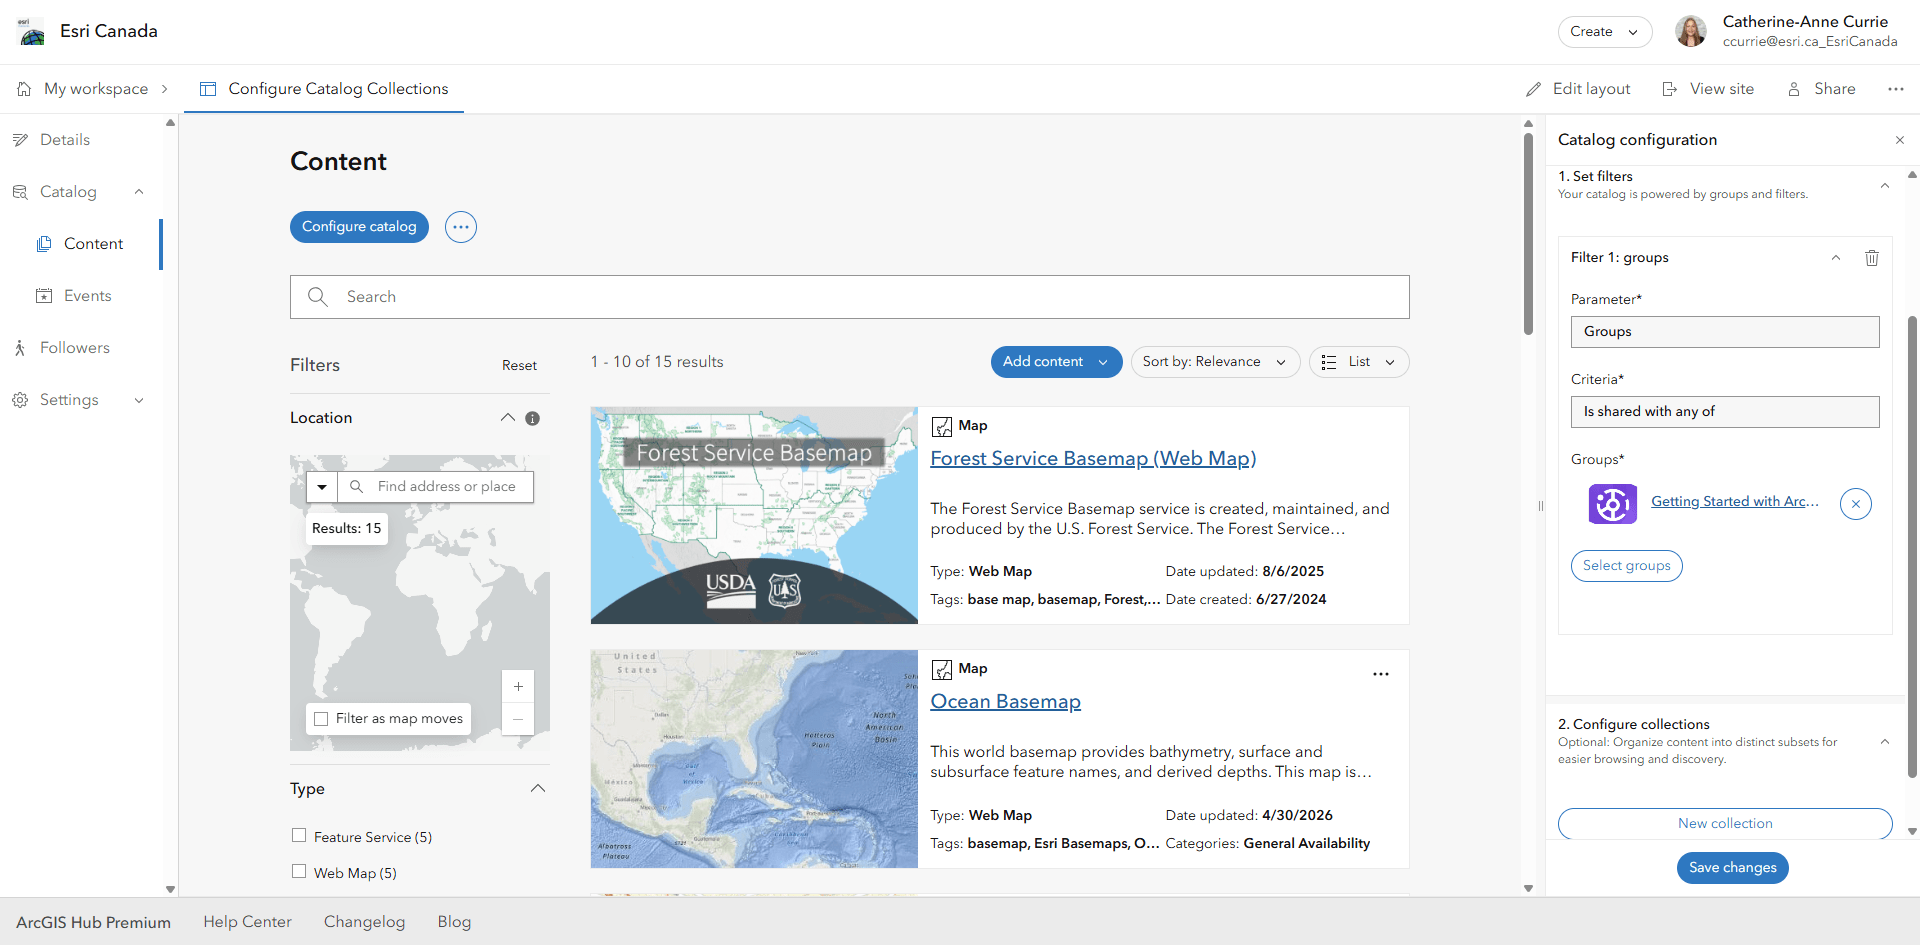
Now that you have chosen the groups for your catalog you will see your content
Upgrade your catalog
If you are working with a Hub site that was created before November 8th, 2025, but still want to take advantage of catalog collections, no worries. All you have to do is upgrade your catalog. You can upgrade the catalog of your Hub site from the Manage page. Select catalog and then open the content page. From there, all you need to do is click “Upgrade catalog”.
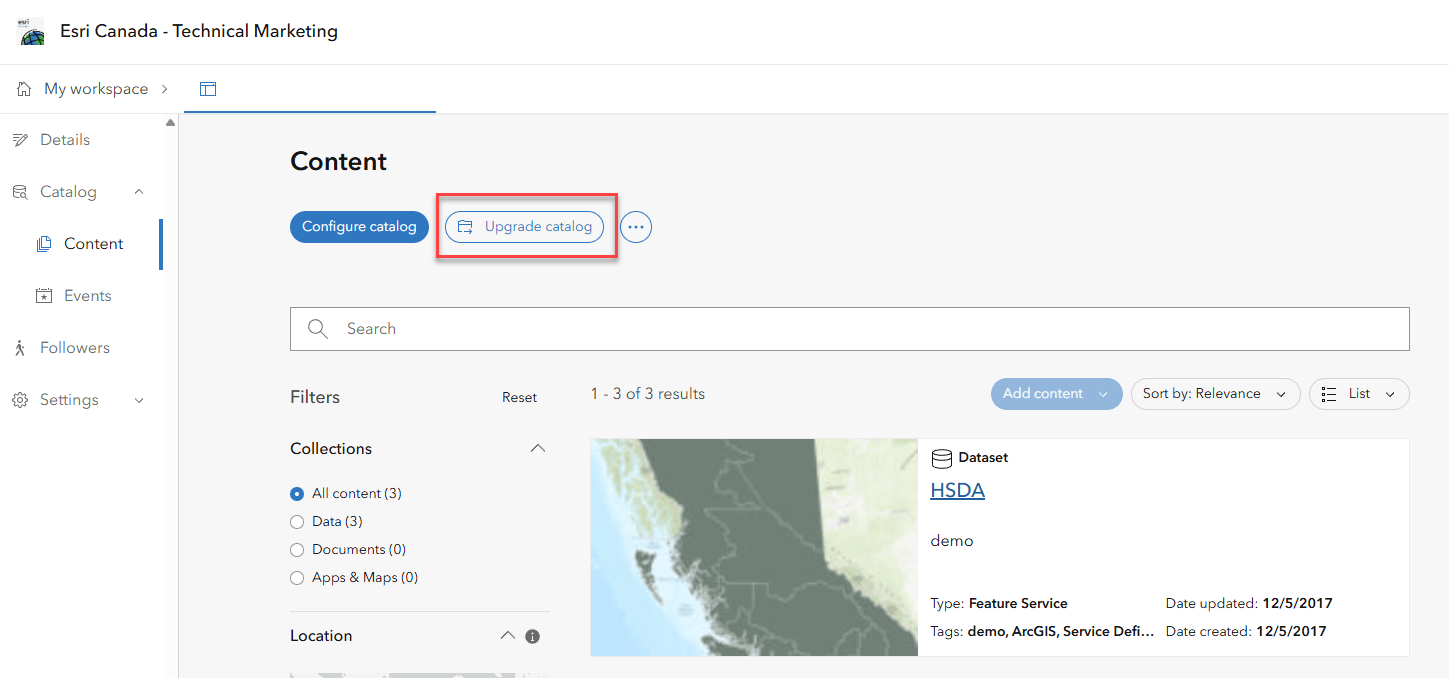
Older ArcGIS Hub sites will need to upgrade their catalog to unlock collections
Ensure to read through the warning before continuing to upgrade your catalog.
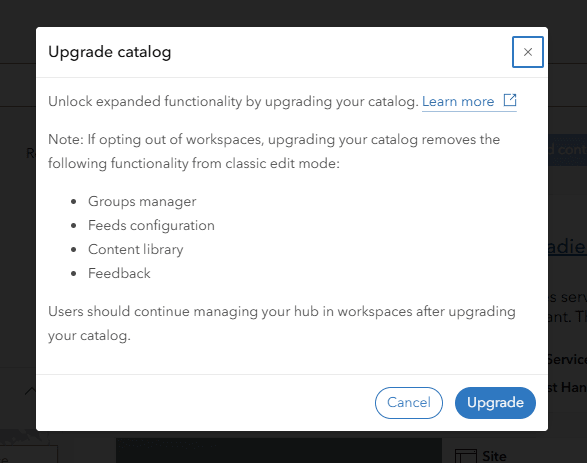
Warning before upgrading your catalog
TIP: Classic Edit mode will be retired in June 2026. If you are not already using workspaces, now is the time to make the switch!
Now your catalog is upgraded and ready to start configuring your first catalog collection.
Configuring catalog collections
To start configuring your first catalog collection you will need to the dropdown for “2. Configure collections” and click on “New collection”.
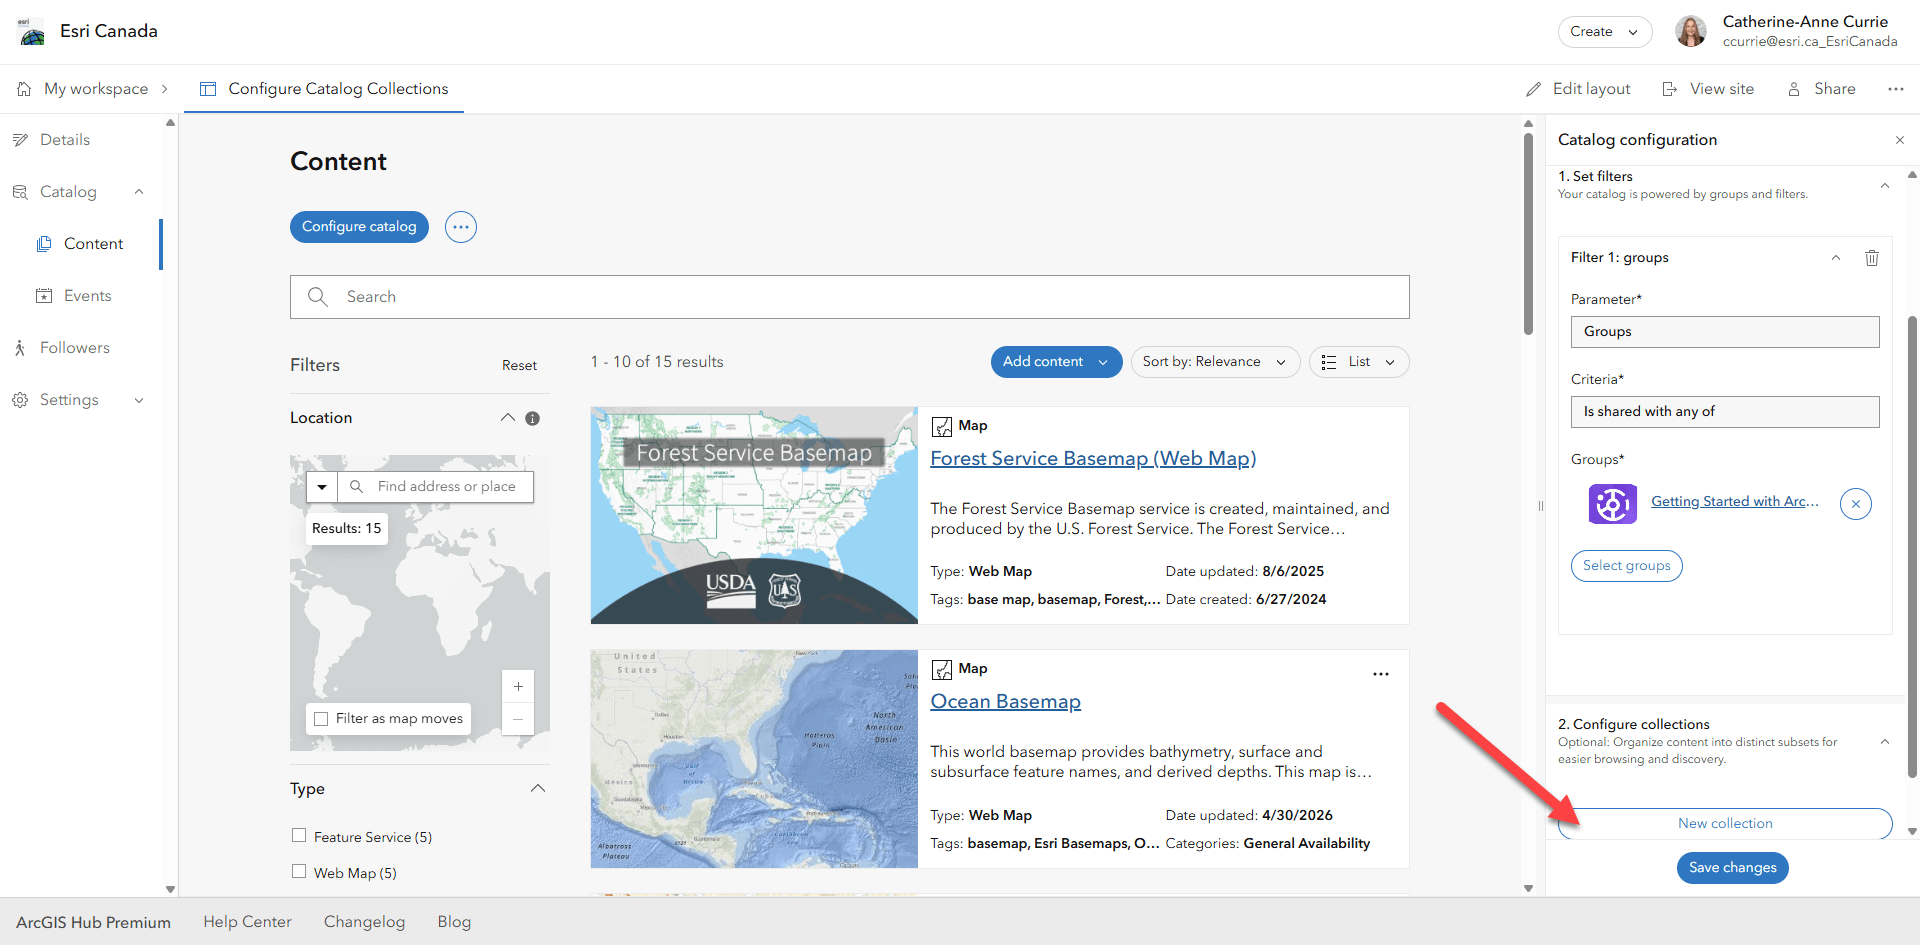
To get started click on the New Collection button
From here you will be able to set up a filter for your collection. To set up the filter, we need to select a parameter (manual selection, date created, type, etc.), set the criteria (is any of, is none of, is in between, etc.) and choose any other parameter dependent information.

Create your collection by configuring filters
As a reminder, ArcGIS Hub Basic members can configure up to 4 collections with each collection being based on one filter. ArcGIS Hub Premium members can configure up to 10 collections with each collection having as many filters as you would like.
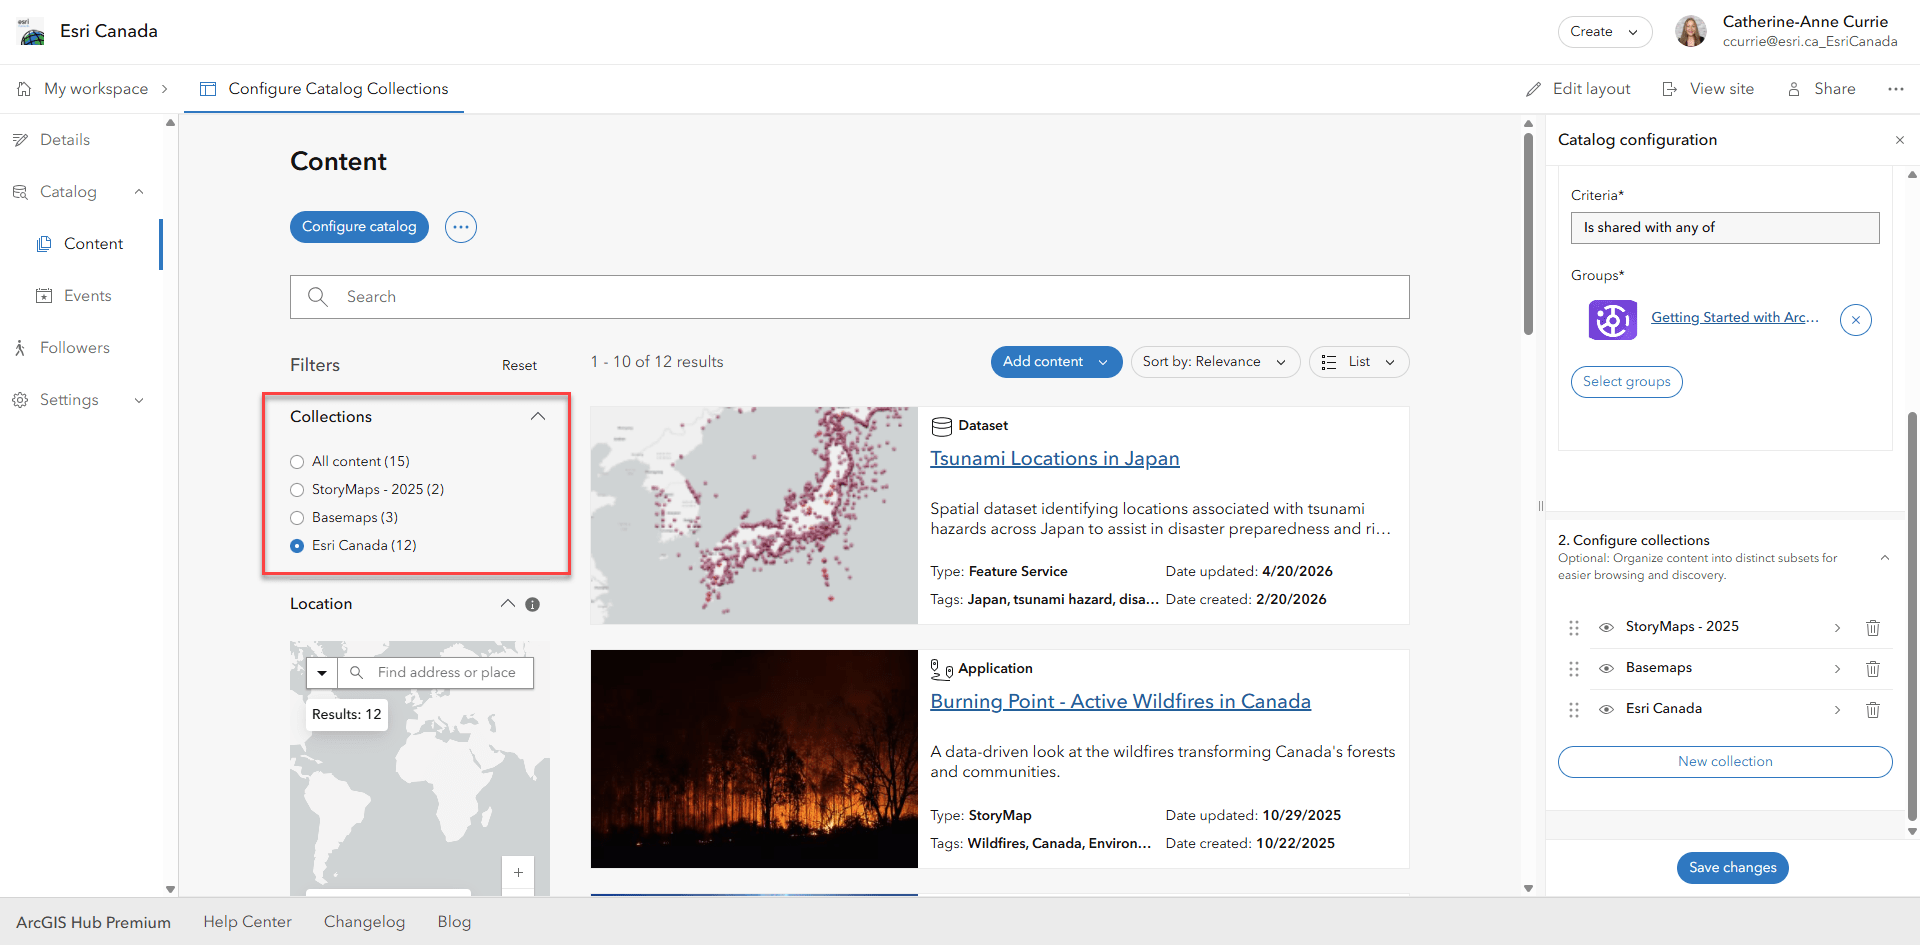
Catalog Collections will be displayed on the lefthand side of your catalog
Once you are happy with the collections you have created, you will see them automatically applied to the catalog preview under the collections dropdown. All there is left to do is save your changes and your catalog collections are ready to go!