NG9-1-1 Data Manager Part 2: Submission and Discrepancy Review
NG9-1-1 Data Manager 2.4 is here - bringing faster workflows, smarter tools, and practical upgrades to keep your data accurate and NENA- compliant.
Previously in Part 1
If you have kept up with part one of this two-part blog series, welcome back! For all the new readers who are joining us for part two, welcome! If you have not read part one, I have included a link to that blog post here. For context, in part one we utilized some of the new tools in NG9-1-1 Data Manager: Add Address Points by Road and Rename Road to help prepare some of our NG9-1-1 datasets. In this post, we will explore the workflow of submitting this data to our NG9-1-1 Aggregator and resolve some discrepancies found in our data.
Submitting Data to the NG9-1-1 Aggregator
NG9-1-1 Submission Tool
The NG9-1-1 Submission Tool is a new addition to NG9-1-1 Data Manager. After we have created our new address points and renamed our road, we can use the submission tool to create a data package that can be submitted to our NG9-1-1 aggregator. In part one of this blog series, we created new address points and renamed a road centreline segment. We are now ready to submit these to our NG9-1-1 aggregator.
With the submission tool open, we can select the layers that we want to submit from the feature selection dropdown. In our case, we would select the SiteStructureAddressPoint and RoadCenterline layers.
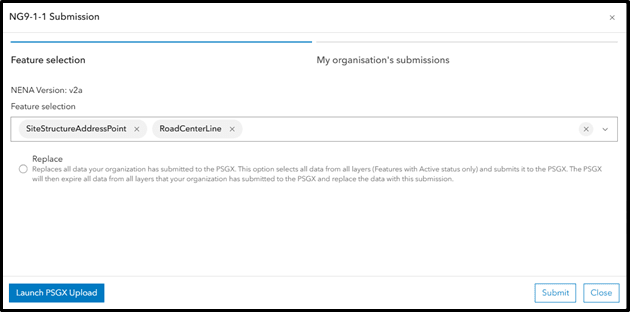
NG9-1-1 Submission tool dialogue box with SiteStructureAddressPoint and RoadCenterline selected
After clicking submit, another dialogue box will appear asking if you are sure about the layers you want to submit. Before clicking submit, you will notice that the method for both layers is showing All. In our scenario, this is our first initial submission of these layers. So all features will be submitted. In later submissions, if we create or edit features in SiteStructureAddressPoint or RoadCenterline and submit these layers again, only the edits that have been made will be submitted. Then under method, you would see delta rather than all.
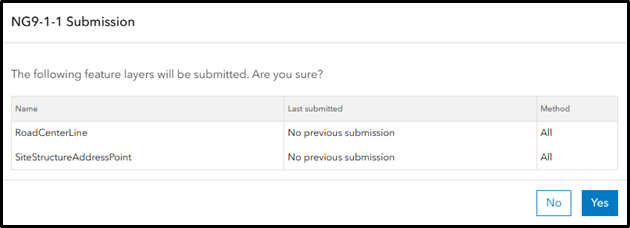
Data submission method dialogue box
After clicking yes, the tool will begin creating a geopackage of our SiteStructureAddressPoint and RoadCenterline layers in the NENA v2a GIS data model. In the screenshot below, the page my organisation’s submissions opens and you will see the current submission under entries.
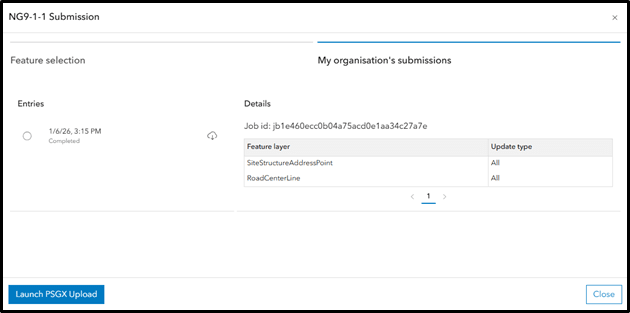
My organisation’s submissions dialogue box after the geopackage is ready to be downloaded
Once you see the download icon appear, you can download the geopackage locally. This is what will be submitted to the NG9-1-1 Aggregator.
PSGX Upload Utility
The Public Safety - GeoXChange® (PSGX) is an Esri Canada Solution for NG9-1-1 Aggregators. If your aggregator has the PSGX deployed, and your organization is registered with your aggregator, you can submit data directly to them by clicking on the Launch PSGX Upload button from the NG9-1-1 Submission tool seen above. Your NG9-1-1 Aggregator will give you login credentials to access the PSGX Upload Utility. From here, we can upload our geopackage directly to our aggregator.
.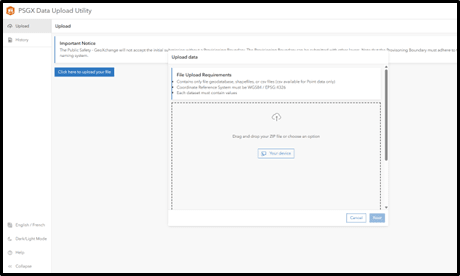
PSGX Upload Utility – Upload Page
One of the benefits of the PSGX upload utility is that we can download discrepancy reports directly from the upload utility immediately after our data has finished the submission process. The PSGX will send you an email notification when the upload is complete.
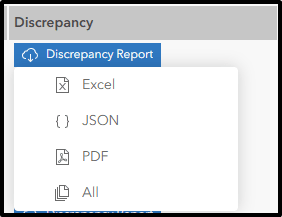
Discrepancy Report Download Dialogue from the PSGX Upload Utility
Ideally, by using NG9-1-1 Data Manager most discrepancies that the PSGX looks for are going to be caught in the built-in quality control checks. However, discrepancies around things like municipal boundaries can still occur like road segments that overlap your municipal boundary. Now you might be thinking to yourself: is there an easy way to resolve these discrepancies? I have good news for you, there is! NG9-1-1 Data Manager has built-in tools to review, edit, and resolve discrepancies that may have been caught in your datasets. To view discrepancy reports in NG9-1-1 Data Manager, you simply need to download the report as JSON.
Discrepancy Review Tools: Review, Edit, and Resolve
The discrepancy review tools are used for reviewing, editing, and resolving discrepancies that your NG9-1-1 aggregator has caught in your data. After receiving your discrepancy report in JSON format, you can upload it for viewing in NG9-1-1 Data Manager using the Upload Discrepancy tool.
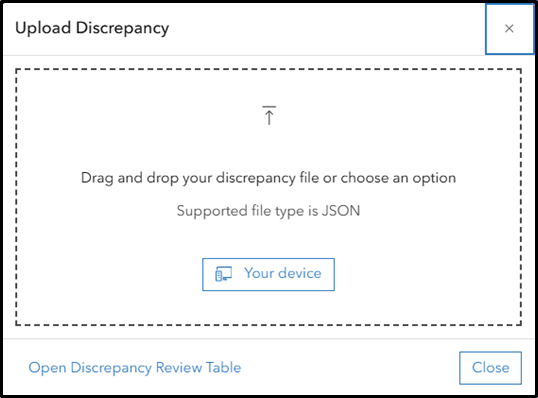
Upload Discrepancy tool dialogue
Once your discrepancy report has been uploaded, it can be viewed using the Discrepancy Review tool. It will appear as a table and each row in the table is a discrepancy that the aggregator has found in your data. The layer the discrepancy is associated with will be listed (i.e.: RoadCentreline) along with an error description. To review, edit and resolve discrepancies you begin this workflow by clicking on the edit icon on the far-right column.

Discrepancy Review tool viewing a discrepancy report
In the case of our data, the NG9-1-1 aggregator has caught a discrepancy for the RoadCentreLine layer. This is the first row in our discrepancy report. When I start my discrepancy review I can see the following error description: road segment has not been segmented where it crosses a polygon boundary.
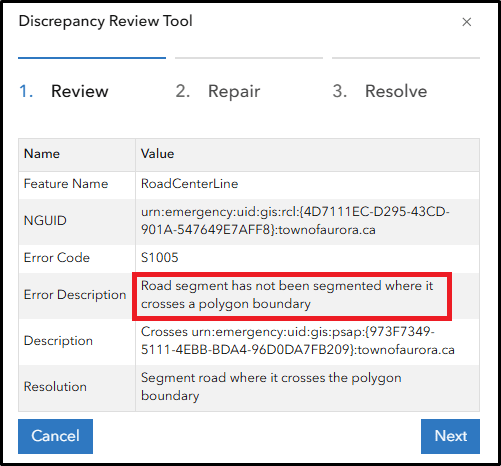
Discrepancy Review tool -Review Dialogue box
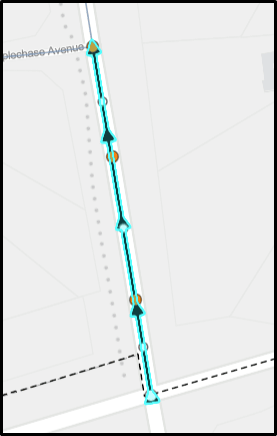
In NG9-1-1 Data Manager, when you begin reviewing a discrepancy the solution will zoom and pan to the feature where the discrepancy has been caught. In this case, it looks like our road segment overlaps our municipal boundary.
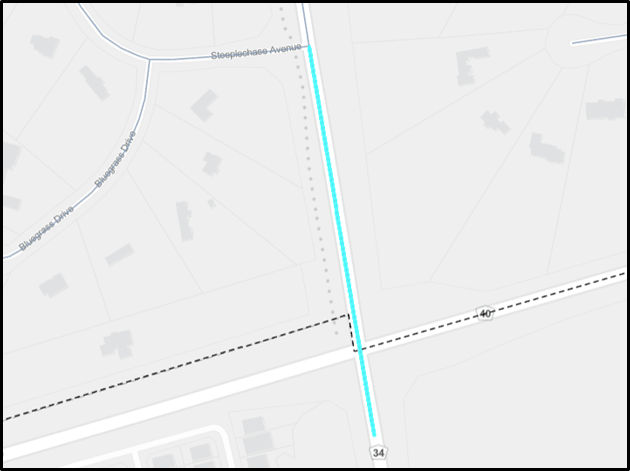
Road segment (highlighted in blue) overlapping a Municipal boundary (dashed line)
This can cause duplicate road segments at the aggregator level if our neighbouring municipality is also submitting the same road segment. The next step in this workflow would be to snap the overlapping road segment to our municipal boundary.
Road Segment (light blue) snapped to a municipal boundary
The last step in the discrepancy review workflow is to mark the discrepancy as resolved in our discrepancy review table. This helps you keep track of discrepancies that you have resolved versus discrepancies that still need to be looked at.

Marking a discrepancy as resolved
Now you can move forward editing and resolving other discrepancies that may be present in your discrepancy report before resubmitting these layers back to your aggregator.
Conclusion
If your organization is looking for a solution for preparing NG9-1-1 datasets, I highly recommend looking at the NG9-1-1 Data Manager. The solution is designed for users to create their NG9-1-1 Data, submit this data to their NG9-1-1 aggregator, and review and resolve discrepancies the aggregator has caught in your data. In this blog we covered creating and editing data using some of the new functionality in NG9-1-1 Data Manager. If you are looking for more information or a product demonstration, make sure to reach out to your account manager or check out the product resource site.