Harness the Power of My Esri
From Novice to Ninja: Mastering My Esri for Maximum Efficiency.
Are you new to My Esri or looking to delve deeper into its features to elevate your Esri experience? Allow us to unveil a treasure trove of time-saving and administrative tools designed to optimize your organization's utilization of Esri products. Discover how these features can streamline your workflows and maximize the value of your Esri investments. Let's embark on a journey to unlock the full potential of My Esri together!
One Stop Shop for Cases, Bugs and Enhancements
You can view all Support cases both current and historical, check their status, review communications on the case and interact with the cases. This can be especially useful when running into an issue previously encountered.
My Esri allows you to go back and revisit old cases, including all email and call notes, to review the details should you require that information in the future. This allows you to review the solution to the previous issue if the issue represents itself or even find troubleshooting steps provided to you through a previous case that may help to debug your current issue.
For large organizations, you can also gauge, at a high level, what hurdles other departments have encountered and share knowledge.
My Esri also provides a summary of bugs and enhancements tied to your organization making it easy to review their status. There is also the option to subscribe to updates to remain up to date on the fixes, allowing you to be swift with their implementation.
To access all of this information, you’ll want to begin on the Support Overview page. It provides a summary of your organization’s cases, bugs, and enhancements. It allows you to drill down to view more specific details in each category as well. To view this page, go to the Support tab and choose Overview.
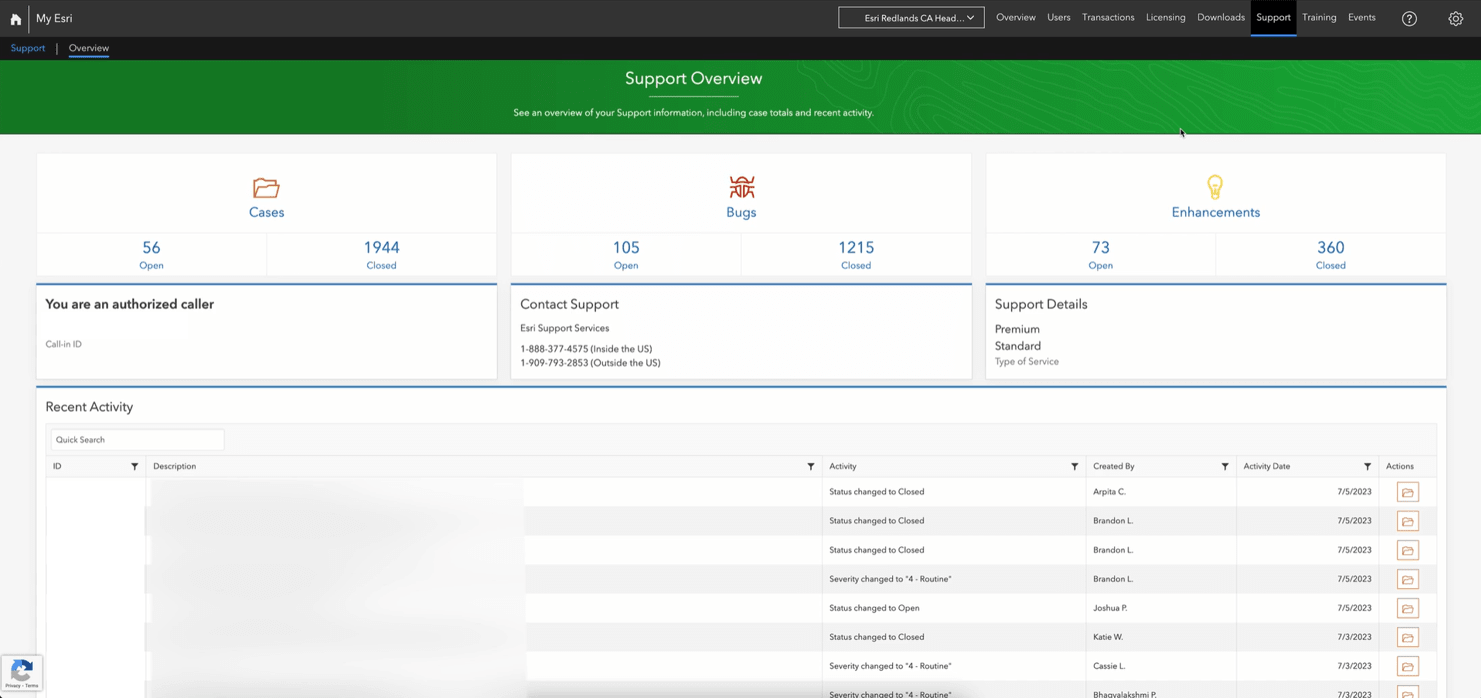
Check out the My Esri & Technical Support video for more information on the actions that can be taken on this page.
Save Time by Creating an Effective System Profile
If you find that creating cases in My Esri is a bit slow, it’s likely due to not having a System Profile in place. System Profiles allow you to prepopulate all the information for step one of the Request a Case form. By storing your system configurations, it prevents the need to manually enter system information each time you submit a case. It also provides the Support analyst handling your case with this key information, getting them off to a running start on their initial investigation into your request.
When creating a System Profile, be sure to name everything intuitively. Always name System Profiles and their corresponding Machine Names, with descriptive names (user and/or machine names) to make the case creation process easier. It will be easier for you and others within your organization, to select the appropriate System Profile and Machine if intuitive naming conventions are followed. Do not assume that because you understand the label, that your colleagues will understand the label.
Note: Users must have the “Take authorized caller actions” permission in My Esri to access the System Profiles page.
To create a System Profile, go to the mega menu > Support tab > and click on Cases.
Then click on System Profiles in the sub menu.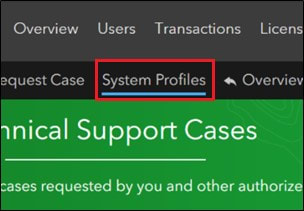
Following this, click on Create System Profile on the right-hand side of the page.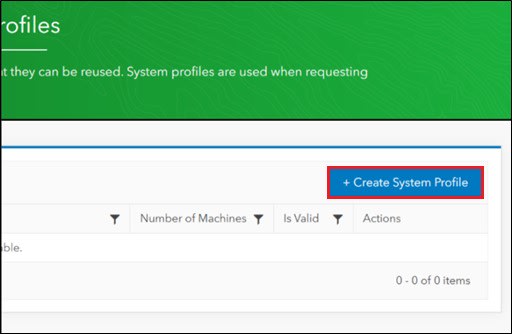
Complete the profile details.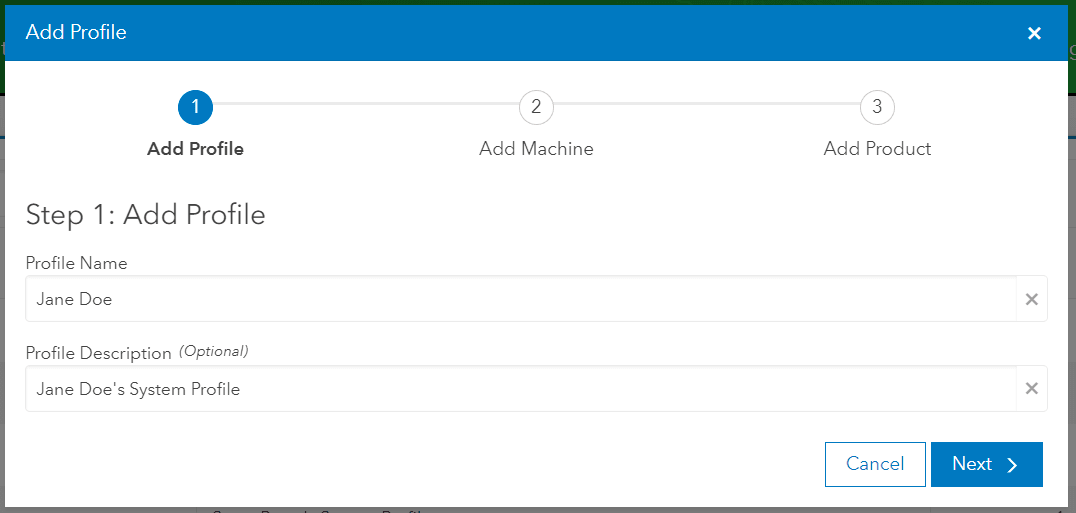
Next, add your Machine details that you have the software installed on.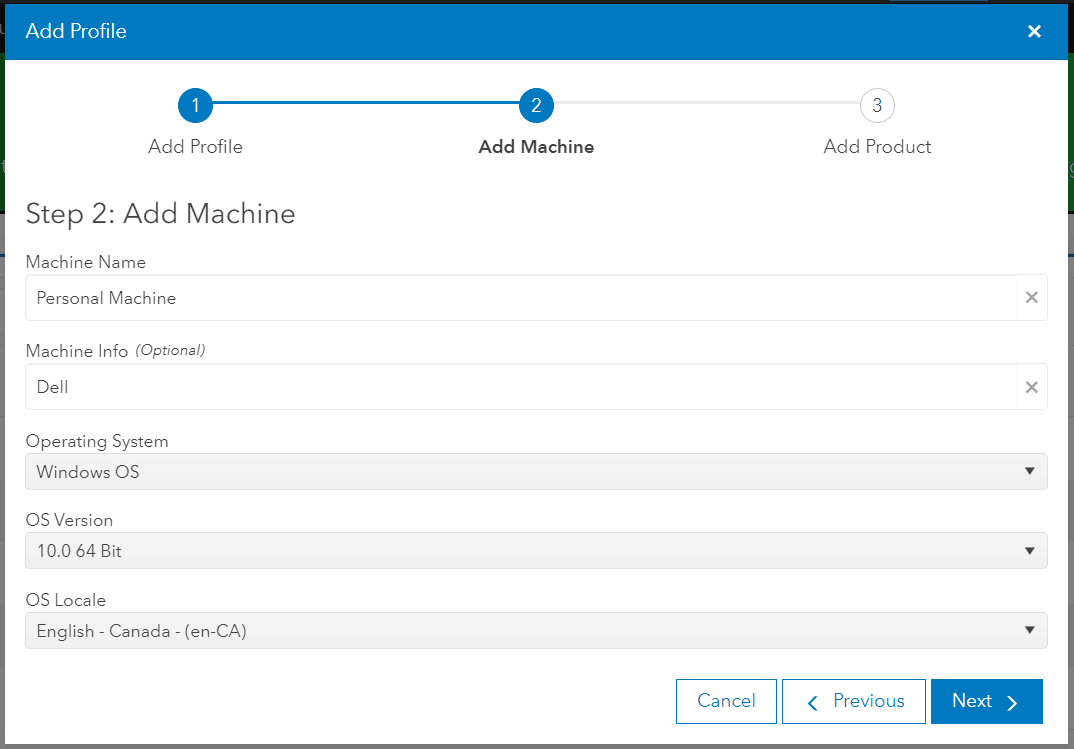
Complete the details for the product. This prevents the need to enter these details the next time you log a Support case. Click Add Profile when done.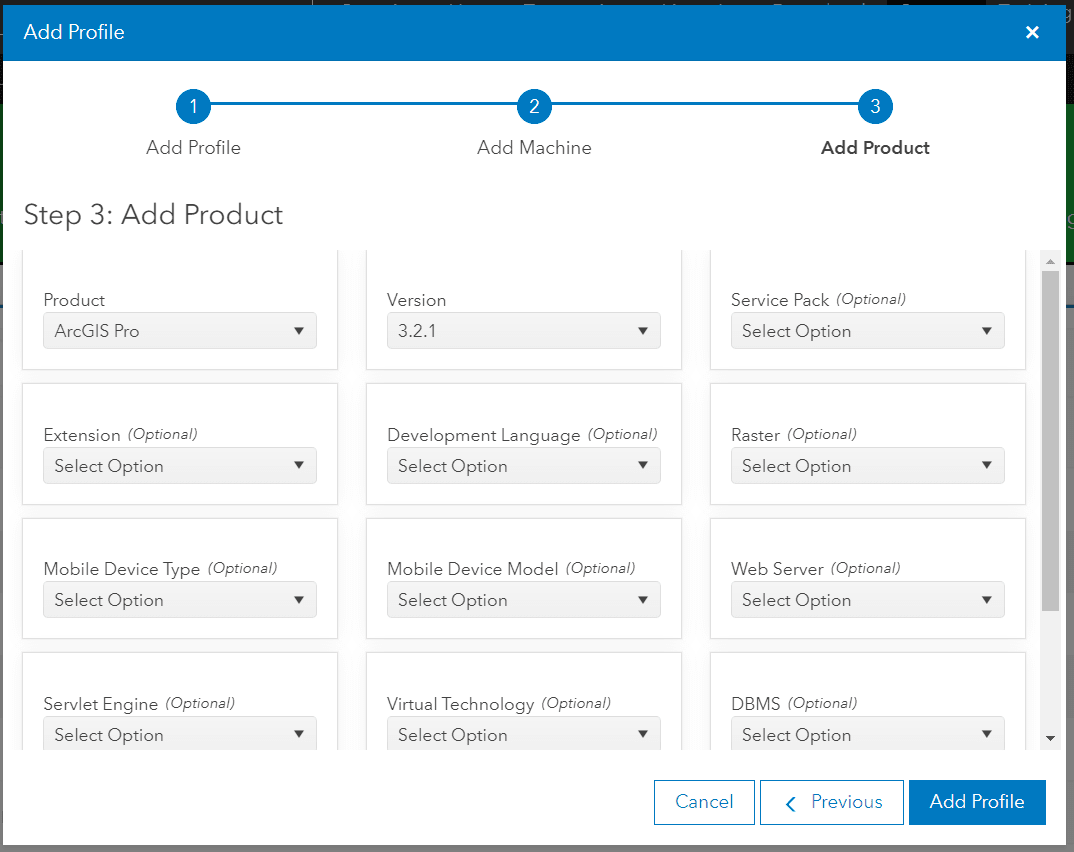
Upon expanding the new System Profile line item, you have the option to edit the details to reflect any machine or product changes as needed or add additional products to the machine. This is useful if you have multiple environments and/or products.
Once created, you can use the System Profile when logging a Technical Support case by selecting the “Using a system profile” radio button.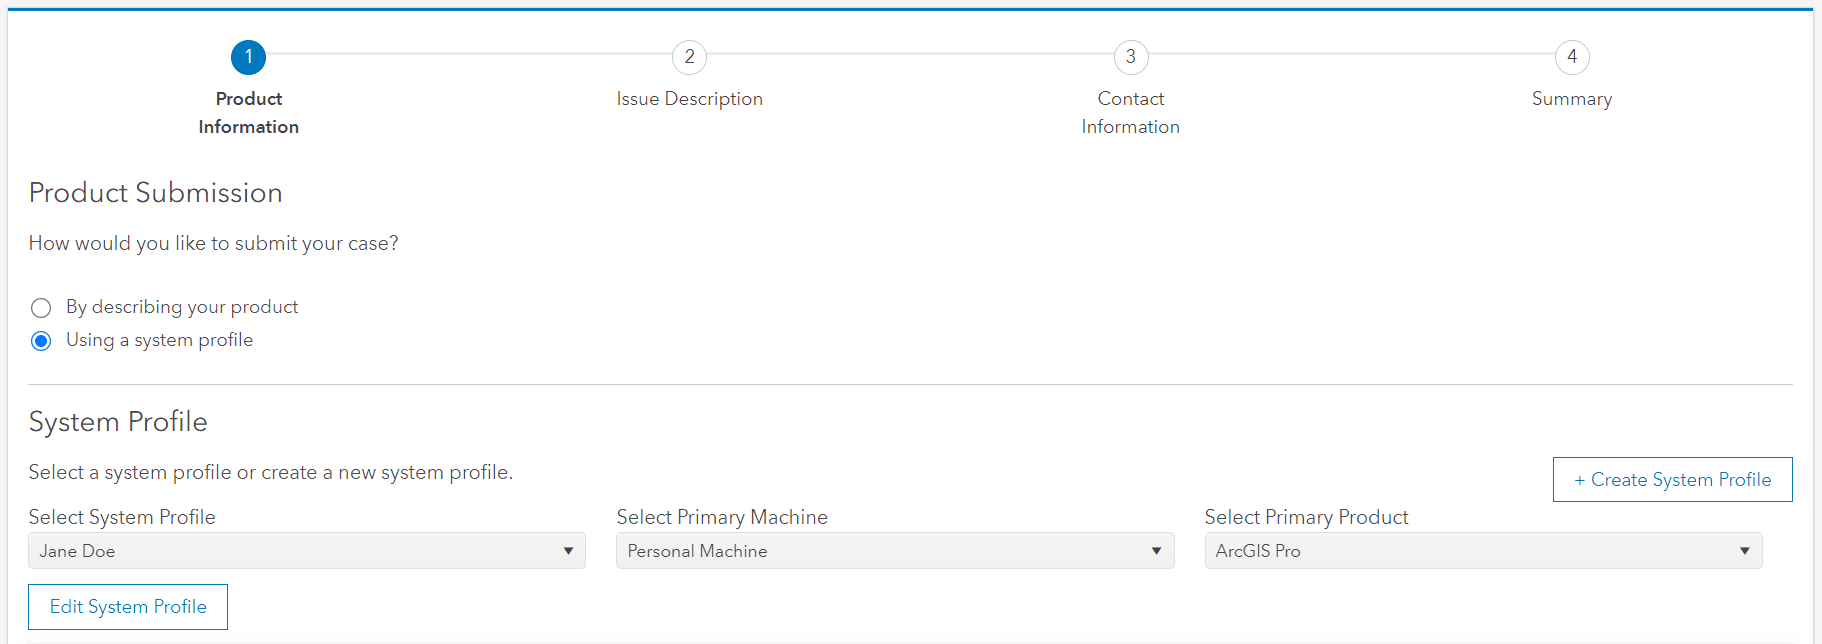
An alternative way to create a System Profile is by environment types. Below is an example of creating an ArcGIS Enterprise System Profile for multiple environments.
- Machine Name: Production Server
- Product: ArcGIS Enterprise 10.9.1
- Product: SQL Server 2019
- Machine Name: Staging Server
- Product: ArcGIS Enterprise 11.2
- Product: SQL Server 2022
It will be up to your organization to determine how to best organize your System Profiles based on your architecture.
License Administration
Ensuring proper license administration is crucial for empowering your users with the products they need to excel in their roles and to fully leverage your organization's licenses.
Managing License Files
As a License Administrator, you will need to manage already-generated license files. Common scenarios for this include:
- When software versions are updated.
- When your organization expands the software that you are using.
- When users are added to or leave your organization.
The License Files page in My Esri (accessible via the Licensing tab in the mega menu) is used to manage the license files that have been created for your organization.
License Administrators can use the buttons in the Actions column of the License Files page grid to perform the following license file management tasks:
- Edit license files for Portal for ArcGIS, allowing you to add and remove products from existing files.
- Email license files to specific users in your organization. End users will be sent the license along with an email containing instructions for using the license.
- Download license files to your local machine.
- Cancel license files for a specific user in your organization, allowing the quantities for the products included in the file to be available for licensing. If the license file has been delivered to a user, cancelling the license file will not prevent them from successfully using the file in the Software Authorization Wizard. You must contact them and ask them to disregard the file that was sent.
Recover Licenses
Recovering lost licenses is a process to retrieve licenses from a machine that is no longer accessible due to system failure, system loss, or destruction. As a License Administrator, you can use the Recover Lost Licenses licensing management tool in My Esri to perform this task. This method must not be used to return individual products from a working machine - that process should only be done through the software de-authorization process, outside of My Esri.
License Management Reports
My Esri provides an administrative reporting feature that License Administrators can use to view, filter, sort and export licensing data, allowing them to better manage the licenses for an organization.
Leveraging Reports
Reports in My Esri are an efficient way to organize the immense data your organization has, being these related to Managing Users, Transactions, Licensing, Authorizations, Support Cases, Events, or Training Records.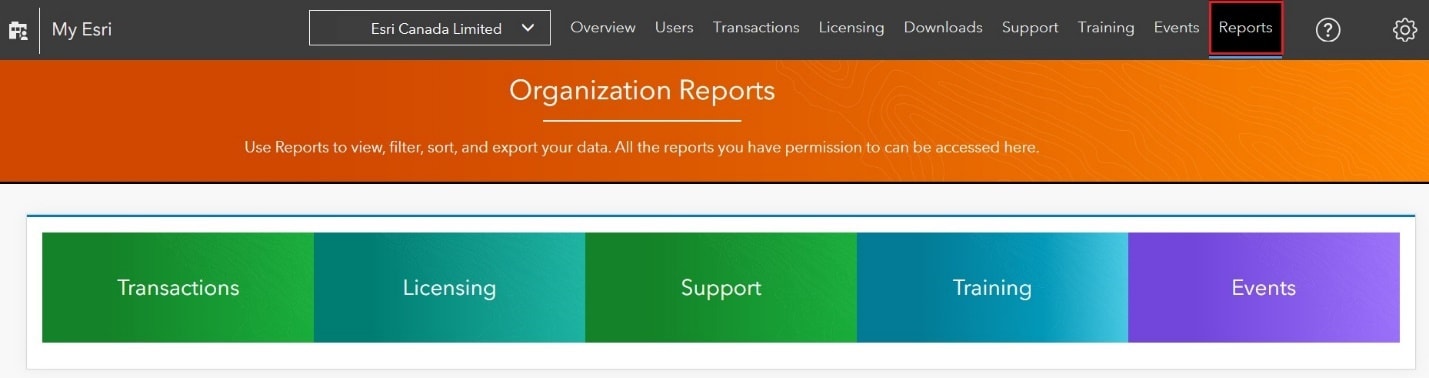
Depending on the permissions you have, there is the ability to produce a report for almost every page on My Esri. In many cases, while on a single reporting tab (ex; Licensing), you can issue reports for several various features.

The Licensing report tab contains reports for Authorizations, Authorizations Activity, License Term Summary, Licensing Files, and Portal Licensing Files.
If you are connected to more than one organization, you can pin the accounts. You can then select one or more organizations to be included in a report by clicking on the dropdown arrow in the Select Customers tab and checking the box next to the desired organizations. The resulting reports will include data for any and all organizations selected.

You can also sort the reports, view them using the different filters provided and ultimately export them to Excel for further analysis.
Common Questions and Guided Help for Self-Learners
Built into My Esri is a Help section which offers guidance on how to use My Esri or learn about Esri products and practices. Among its many gems, the "Common Questions and Guided Help" stands out as a shining star, offering a lifeline of knowledge to aid you in unraveling the mysteries of My Esri and empowering you to wield its tools with finesse.

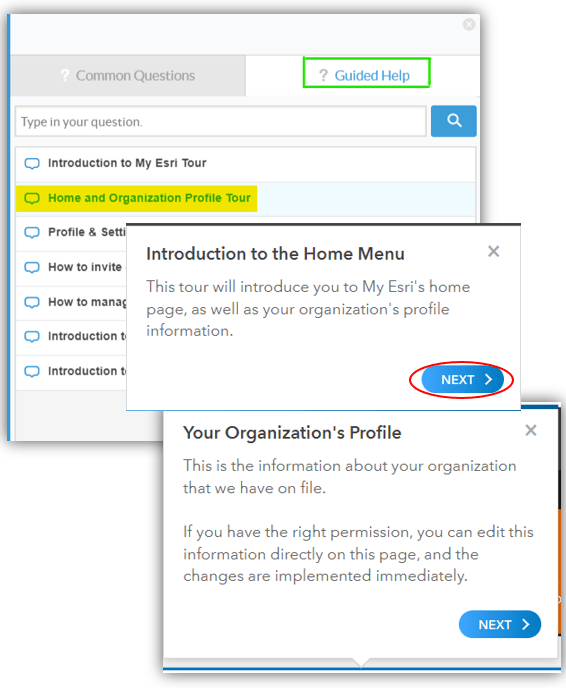
Common Questions
Questions are grouped by topics. Once you click on a topic, there are a range of questions you can browse. Selecting a question opens a new pop-up window with the answer. Alternatively, you can type your question in the box provided, then click the magnifying glass to search:

Guided Help
Guided Help is another resource to learn My Esri workflows. Choose a workflow to learn and the Guided Actions will walk you through where to click to accomplish the task. This content is updated frequently, so be sure to check for new tours and additions.
My Esri Web Courses
From the Help menu, you can also quickly jump to the My Esri Web Courses in the Esri Academy.
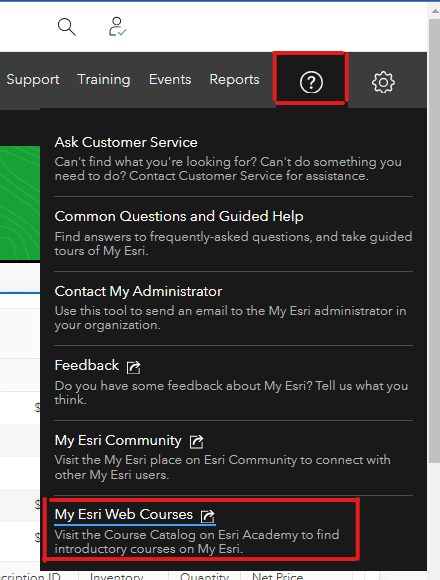
These are free introductory courses on My Esri. During the course, you perform course exercises using your own My Esri organization and data. Therefore, it’s important to keep in mind that, as you work through the exercises, you will be making live updates.
Enable an ArcGIS Online Organizational User for My Esri
When it comes to ArcGIS Online organizational accounts, there is the ability to configure these users for My Esri access.
This feature eliminates the need for end users to create separate ArcGIS Public Accounts solely for My Esri access, streamlining the user experience and enhancing efficiency. By adding an ArcGIS Online organizational user to My Esri, you not only grant the user access to My Esri but also consolidate user access for both ArcGIS Online and My Esri under a unified account.
While a user leaving an organization does require that they be removed from both accounts, removing or deactivating a user solely from ArcGIS Online will automatically revoke their My Esri access, preemptively securing organizational data until they can be properly removed from My Esri as well. Since most organizations have better administrative practices when it comes to ArcGIS Online, this is an added benefit of inviting ArcGIS Online organizational users (with Esri Access enabled) to your My Esri organization.
The My Esri Administrator can work together with the ArcGIS Online Administrator, assuming they are different people, to enable Esri Access on any ArcGIS Online organizational users they would like to connect to their organization in My Esri. Once the ArcGIS Online organizational user is Esri Enabled, they can then be invited to join the organization in My Esri.
Please refer to the Enable Esri Access section of the ArcGIS Online – Manage Members documentation for complete steps on this process. Following this, you can invite the ArcGIS Online organizational user to your My Esri organization. Considerations and steps for the process of inviting new My Esri users can be found in the “Navigating User Access in My Esri” blog.
Note: enabling Esri Access on a user in ArcGIS Online must happen prior to connecting the user to your My Esri organization. If you attempt to connect the ArcGIS Online user account before enabling Esri access, it will fail.
Reviewing Your Connected Organizations
Quite often, users are connected to more than one organization in My Esri. If you need to check which ones your user is connected to, go to the Profile & Settings page, accessible from the User drop-down menu.
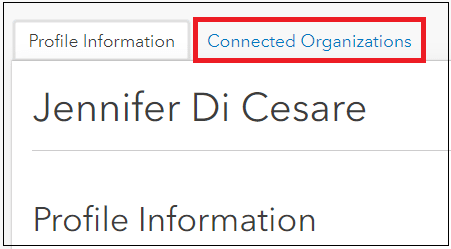
You will see a list of all the organizations your user is connected to. Furthermore, you can click on the Expand Details button (“+”) beside each organization to review your permissions if needed.
Adding a Security Contact
Last, but not at all least, is the option to add a Security Contact for your organization. This allows you to add someone from your organization that Esri can directly notify if there are any security issues. Adding a new Security Contact can be done from the homepage. You will find the option to Add Security Contact near the bottom of the page.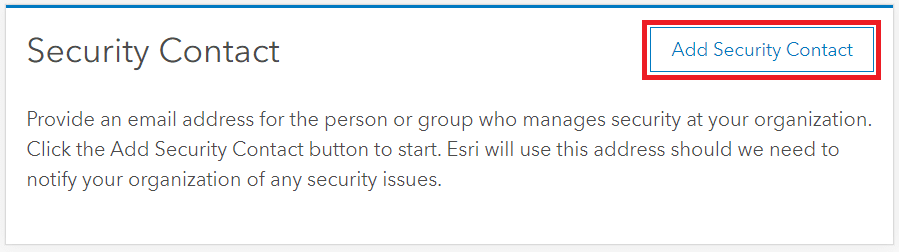
Achievement Unlocked
We hope you had some educational epiphanies that help elevate your My Esri experience and efficiency moving forward. It’s a powerful portal, that if harnessed correctly, can optimize your organization's utilization of Esri products and streamline your workflows to achieve that next level of mastery.
Need More Help?
Compiled below is a list of resources to help through your administrator journey when it comes to managing users in My Esri. If you need further assistance, feel free to reach out to the Esri Canada Customer Care team.
Additional Resources
My Esri Login – website.
Create and Esri account – website.
My Esri & Technical Support – video for Users working with Technical Support cases, bugs, and enhancements.
How to Administer Users on My Esri – PDF for Admins.