Integrating ArcGIS CityEngine 3D designs with Twinmotion
Let’s say you are part of a team of urban planners and designers. Your team was asked to create a master plan proposal, complete with scenarios and compelling visuals. You leveraged Esri’s focused applications for this task: ArcGIS Urban and ArcGIS CityEngine. Massing was generated in Urban and then brought into CityEngine where through the magic of Computer-Generated Architecture (CGA) modelling, streets were drawn, 3D assets were inserted and facades were added to the buildings. But now what if you really want to bring your digital scene to life? What if you or your stakeholders wish to explore your designs as if you were in the study area in person? What if you want to add a sense of realism by simulating different environmental effects and animations? In this blog I will discuss how you can achieve all of these by integrating CityEngine models with Twinmotion.
What is Twinmotion?
Twinmotion is a real-time 3D visualization app created by Epic Games. It is powered by Unreal Engine, an advanced, comprehensive rendering engine for creating games, films, visualizations and immersive experiences across multiple desktop, mobile and console platforms. Twinmotion is designed with an interface that makes it easy for users to produce high-quality 3D visualizations in real time, without the need to understand the programming languages that are normally required to leverage the game engine. It can consume various 3D file formats, but the best one to use is the Datasmith format that was developed specifically for Unreal Engine. ArcGIS CityEngine is capable of exporting 3D models as a Datasmith file, which can then be ingested seamlessly into Twinmotion with minimal loss of quality and integrity. By doing so, users are empowered with the ability to generate compelling visuals and immersive experiences on the fly. Let’s break down the general steps for integrating a CityEngine scene with Twinmotion (for reference, the following example workflow was completed using CityEngine 2024.1 and Twinmotion 2025.1).
1. Install Twinmotion
Twinmotion is a desktop application and leverages your computer’s hardware and software capabilities. It is important to pay attention to the minimum and high-end system requirements depending on your project size and use case. Once you have met the specifications, follow the information on this page to install the Epic Games Launcher and then the application.
2. Export a scene from CityEngine in Datasmith format
For the purpose of this blog, I used the “Example Planning 05 Urban Design 2024.0” scene that is available for download within CityEngine.
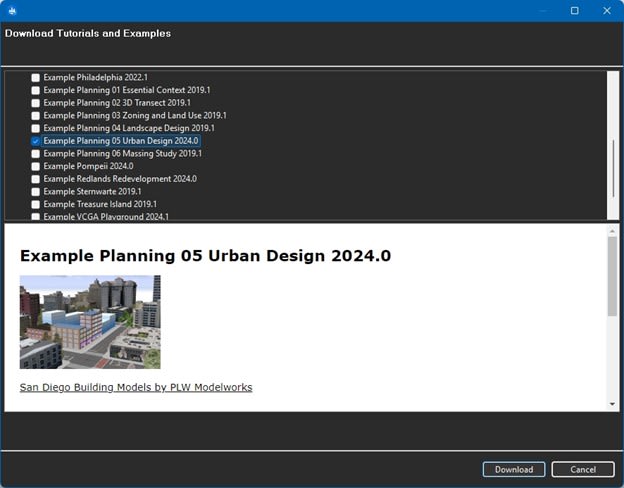
Download this example scene in CityEngine
Open the scene once you have downloaded this example. Add a couple new scenarios in the Scene Editor and copy the group layer containing the models from the default view to each of the scenarios.
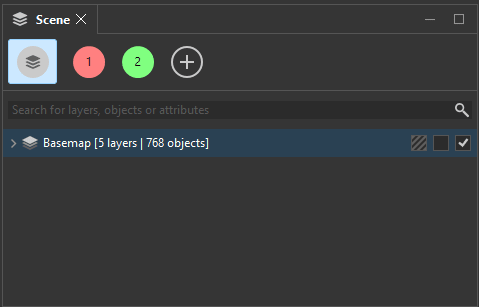
Add scenarios to your scene in the Scene Editor
In the centre of the scene, you will see a city block of buildings and landscaping designs. Go into each of the scenarios and make different modifications to these models. In my example, I have added 3 extra floors to each of the buildings with facades in Scenario 1 and completely altered their facades in Scenario 2. You can apply these changes in the Inspector window after selecting each model.
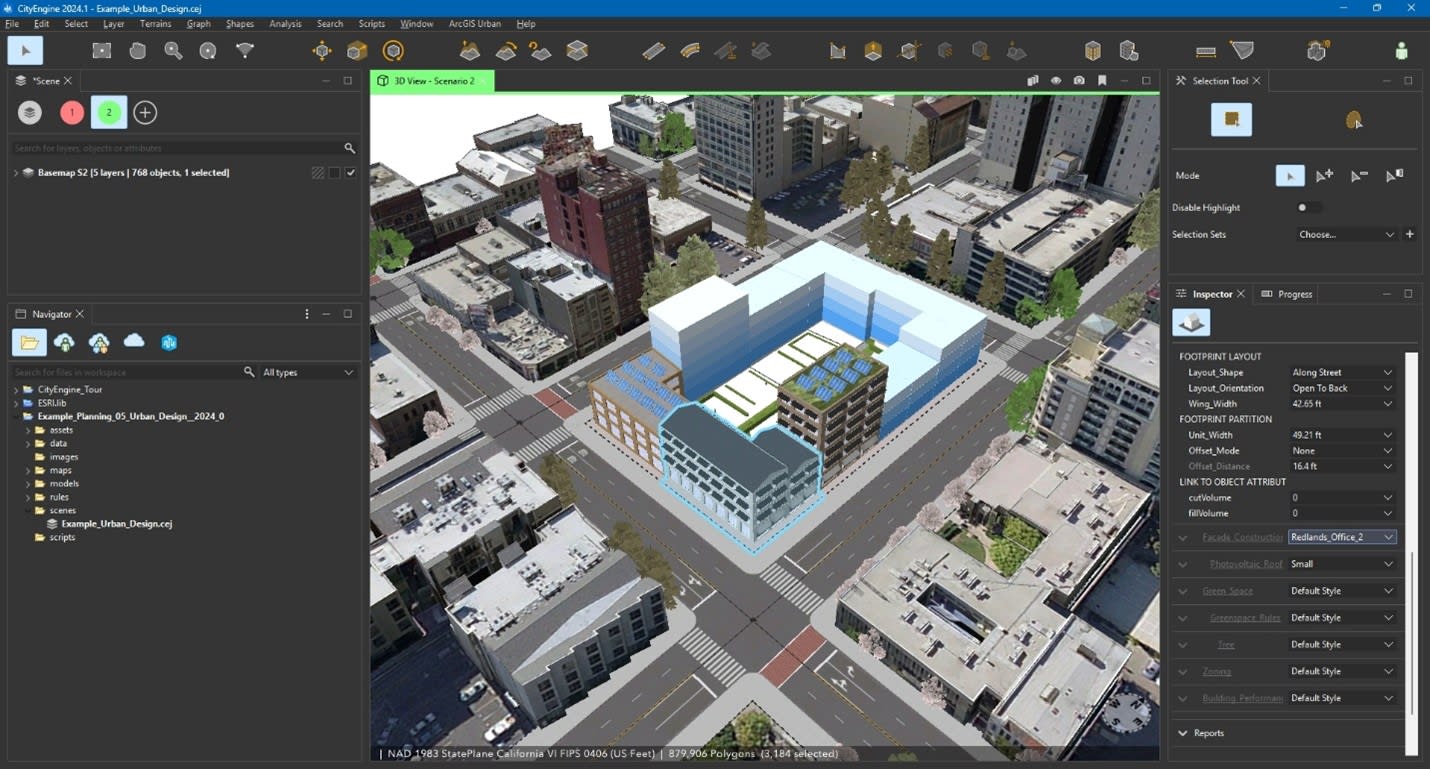
Make modifications in your scenarios
Once you are satisfied with your modifications, choose each scenario (you can treat the default view with the original models as one) and select all the models in it (a simple way is to hit Ctrl+A on your keyboard). Go to File → Export Models (or Ctrl+E) to bring up the window and pick Unreal Engine as the option then hit Next. By default, the exporter will save your outputs in the “models” folder within your CityEngine project unless you specify a different path. Choose an appropriate base name to distinguish between the various scenarios. Check the box to make your models Twinmotion-compatible. Press the Center button under the Global Offset settings to apply a location offset to your objects. Leave all other settings unchanged and hit Finish. Repeat this process for all other scenarios but this time, use the same offset values as in your first export (by default, CityEngine will remember your previous export settings, so these values should not have changed the next time you open the exporter).
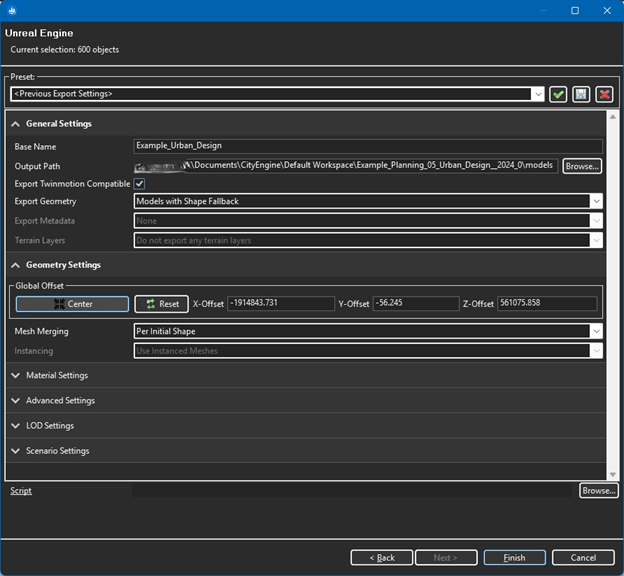
Use these parameters when exporting your CityEngine models
3. Import the scene into Twinmotion
Now you are ready to import your exported models. In Twinmotion, start a new scene. Go to File → Import (or Ctrl+I). The window should be displaying the Geometry tab by default. Choose your first Datasmith file to open. Under Options, ensure the following parameters are set and then import the file. Repeat this step until all scenarios are brought in. On the top right-hand side of the user interface is the Scene Panel. Hover your cursor over the eye icons of the 3 starting elements to turn their visibility off as they are not part of your designs.
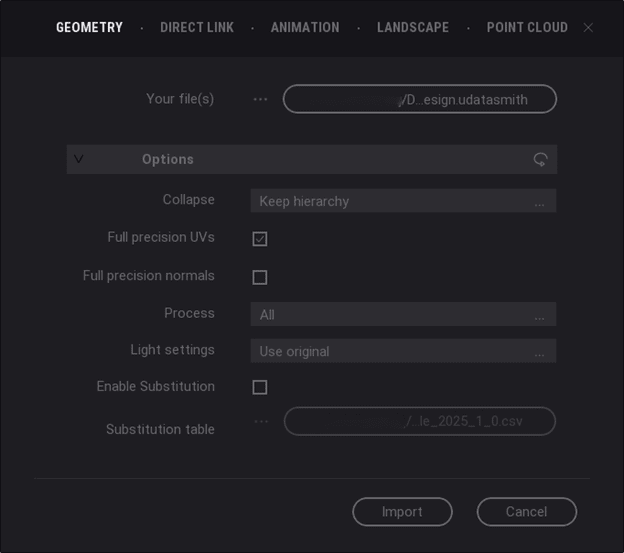
Use these parameters when importing your models in Twinmotion
4. Export the terrain in CityEngine and import it into Twinmotion
It is now time to export the terrain. Twinmotion refers to terrains as landscapes. It currently does not support importing landscapes in Datasmith format, but there are several other ways to bring terrains into the application. For example, I would like to keep the texture (satellite imagery) of my CityEngine scene’s terrain, so I chose to export it as a mesh that can be imported into Twinmotion as geometry. To do so, select the terrain layer in the Scene Editor within CityEngine and open the exporter. This time, pick Autodesk FBX as the format and hit Next. Name the output and follow the parameters below. The terrain resolution can be changed, just keep in mind that the higher it is, the more time it will take to export and the larger the output file will be. To align the terrain properly with the models you have exported previously, be sure to use the same offset values.
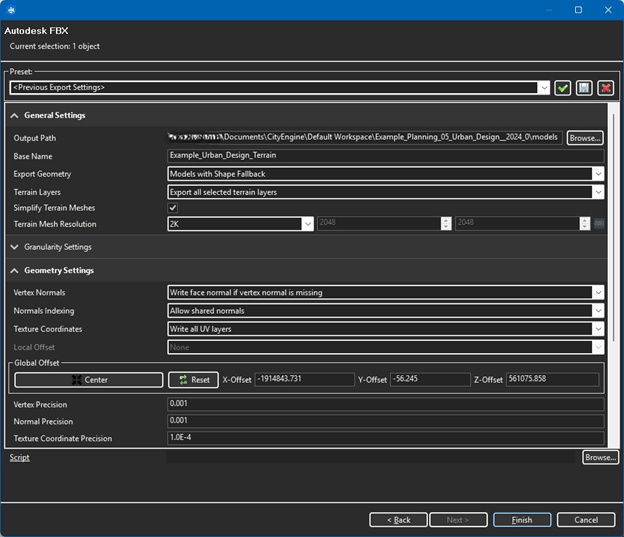
Use these parameters when exporting your terrain in CityEngine
Once you have exported the terrain, import the FBX file as geometry and set the parameters below.
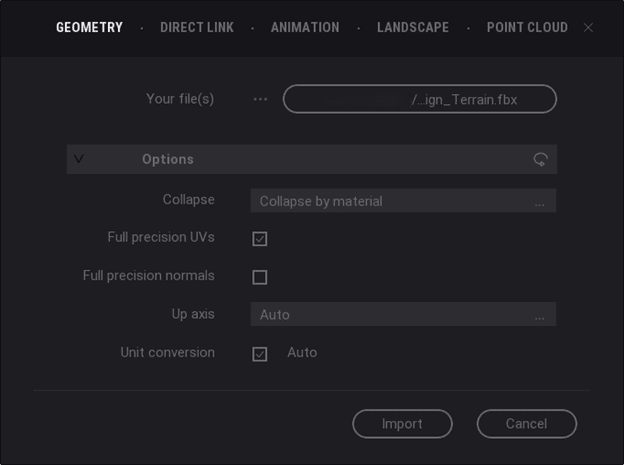
Use these parameters when importing your terrain in Twinmotion
After you have imported the terrain, its orientation may be mismatched with the models that were brought in earlier. You can rotate either the terrain to align with your models or vice versa. In this example, I have rotated the terrain mesh 90° counterclockwise by using the XYZ Panel.
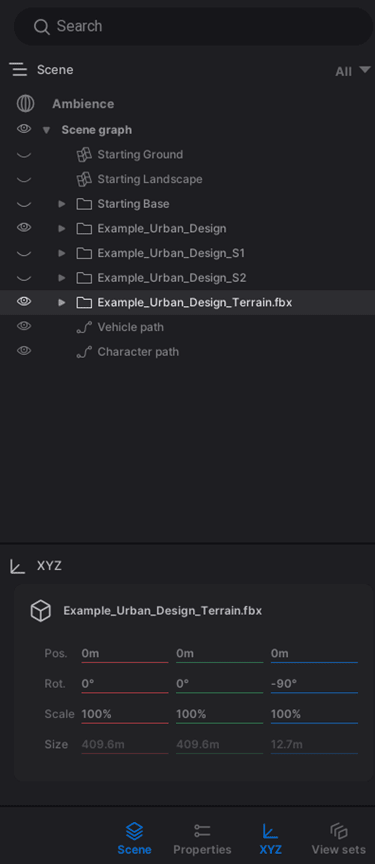
Rotate either your terrain or your models to align with each other
5. Bring your scene to life
Now comes the part where you can leverage the powerful rendering capabilities of Twinmotion to breathe life into your scene. One of the benefits of bringing 3D designs into Twinmotion lies in its vast library of high-quality assets, materials and effects. These can replace your existing models or you can simply insert them. Open the Populate Panel by using the icon at the bottom of the screen. You will find a variety of options to inject assets, animated paths and even OpenStreetMap data.

Populate your scene by placing assets and animated paths
You can also tweak the ambience to add realism by making changes to the environment, camera, renderer and visual effects. Experiment with these settings to get the desired look and feel. Note that if you wish to leverage the more robust rendering options such as Lumen or Path Tracer, your system should meet or exceed the high-end requirements.
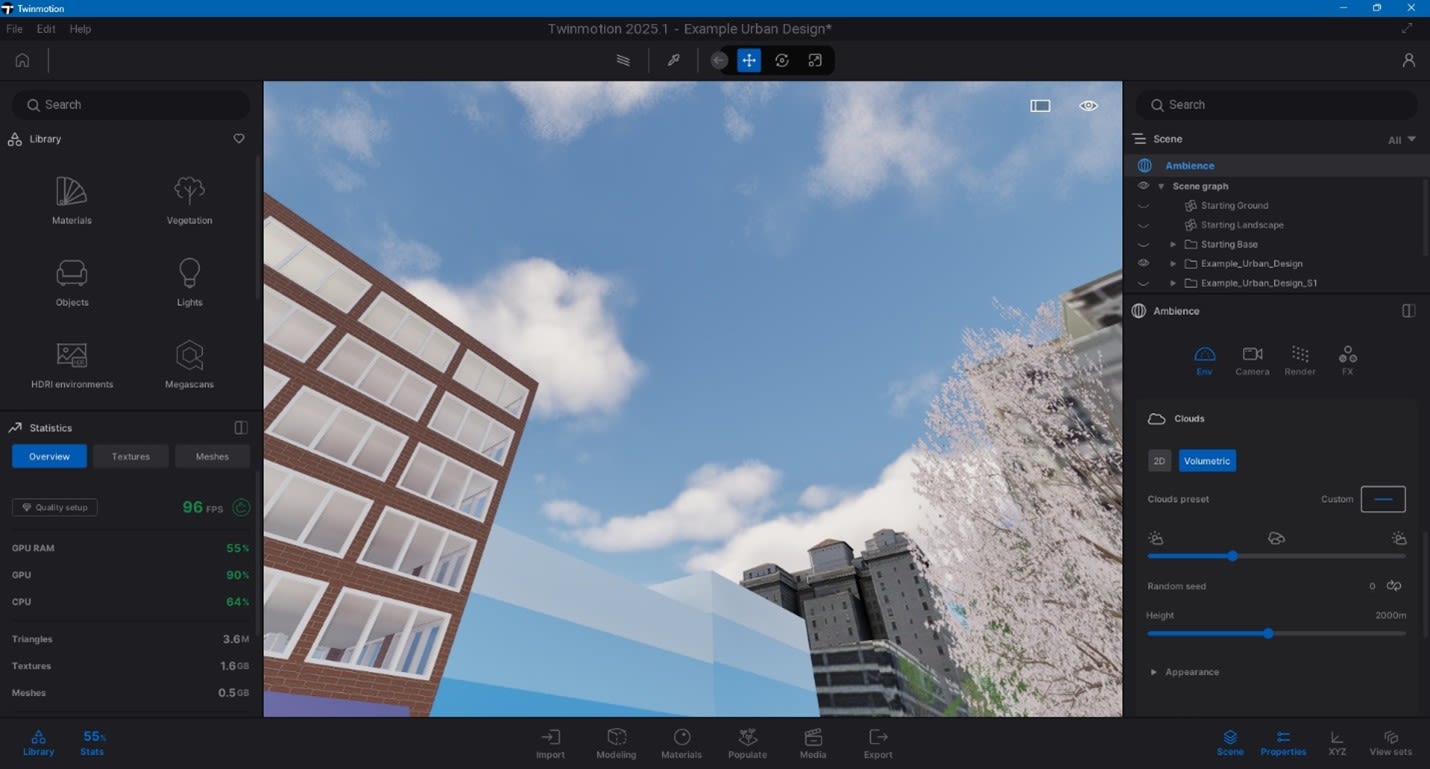
Modify the look and feel of your scene through the ambience settings
6. Set up configurations to show various scenarios
Configurations are states of the scene. You can create these states based on properties, materials, visibility and ambience. In this example, I have added a configuration based on the visibility of each of my scenarios so that I can choose which one to render on the fly. Simply go to the Media icon and pick Configuration, then create states and modify their settings. You can set the trigger to switch between scenarios or as a button to open a list in the scene.
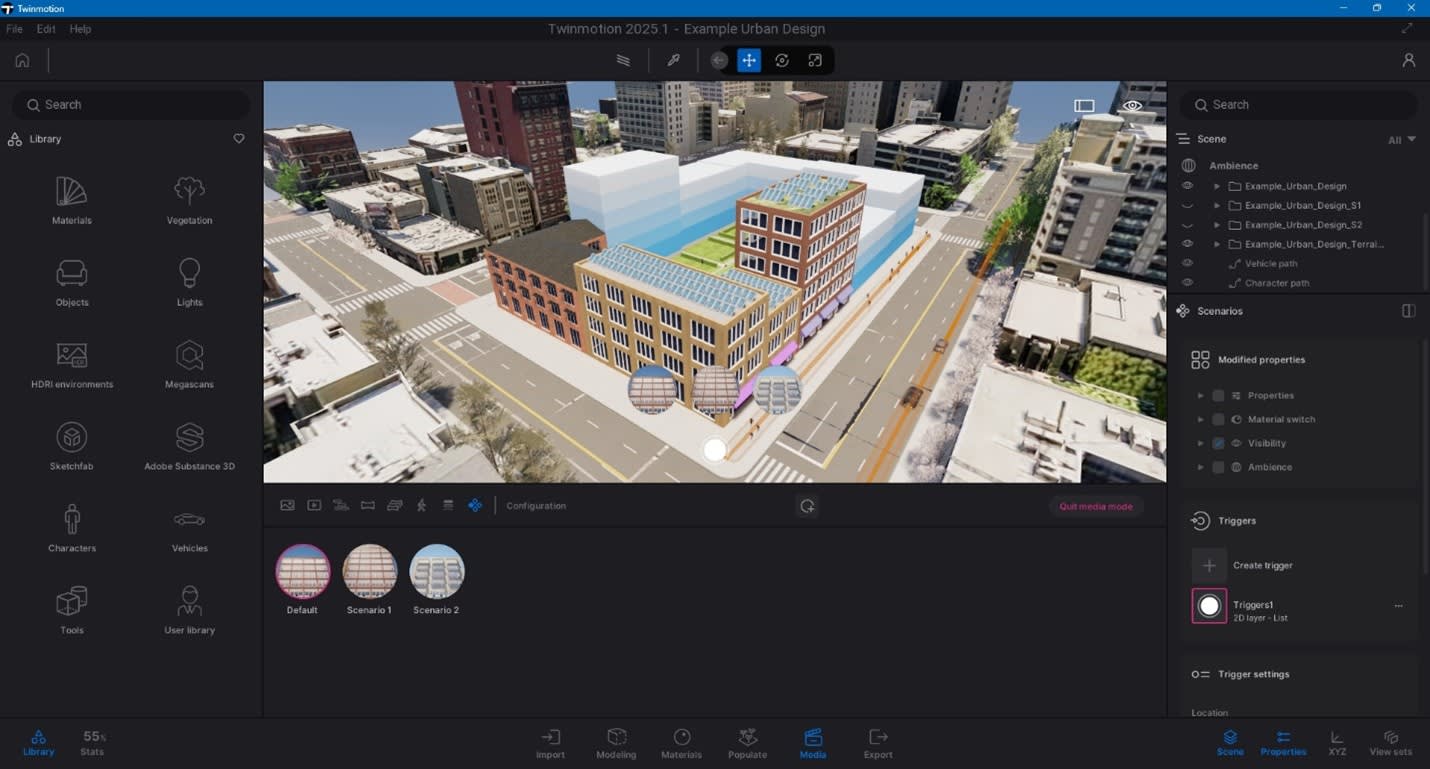
Create configurations to enable the ability to switch between scenarios
7. Set up panoramas to store different viewpoints
Another thing that is useful to set up is panoramas. Remember how bookmarks or slides in ArcGIS 3D scenes can store not only views from all camera angles, but also layer visibility, basemap selection, daylight settings, etc.? In Twinmotion, panorama functions in a similar way in that it allows you to save the scene’s environment, camera, renderer, visual effects, as well as panorama format and the configuration. Create panoramas to serve as 360° viewpoints across your scene. Go to the Media icon and select Panorama to add them.
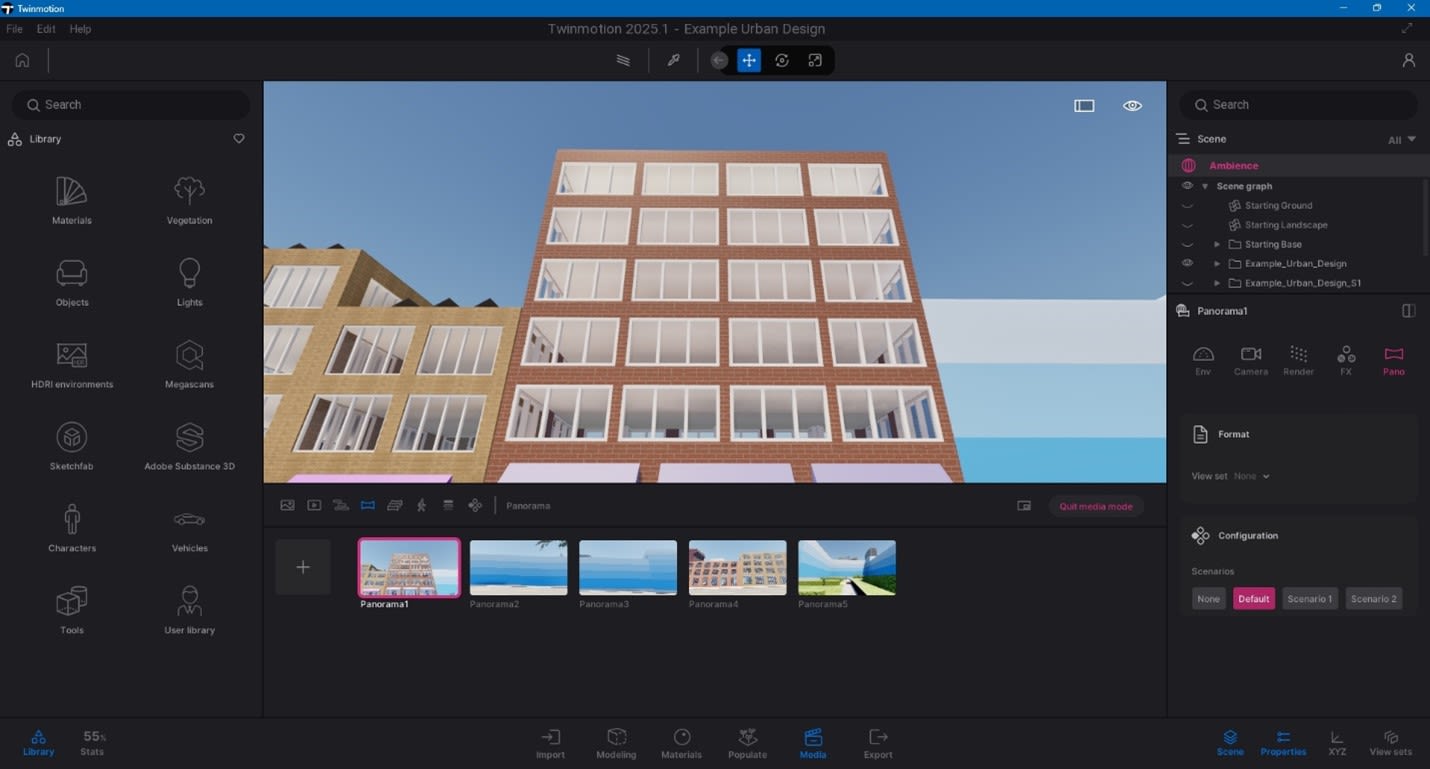
Create panoramas to enable the ability to jump between 360° viewpoints
8. Explore your scene
You are now finally able to fully explore. Move around the viewport using the navigation functions. All of the settings previously mentioned can be modified as you go. Utilize the Media tools to generate products such as images, videos, sequences and more. By default, the viewpoint navigates in the Drone mode which allows you to move the camera to any space within the scene, whether it is above or below the terrain or inside or outside your models. There is also the Pedestrian mode, which places the camera on ground level. This is useful because it offers a realistic feel of the scene by simulating the first-person view of an observer on the ground. Because it is meant to provide realism, object collision is turned on when using this mode so that you can’t go through objects or the ground. If you would like to maintain this authentic experience but also have the ability to explore inside your models, you can leverage the VR mode if a supported virtual reality headset is available.
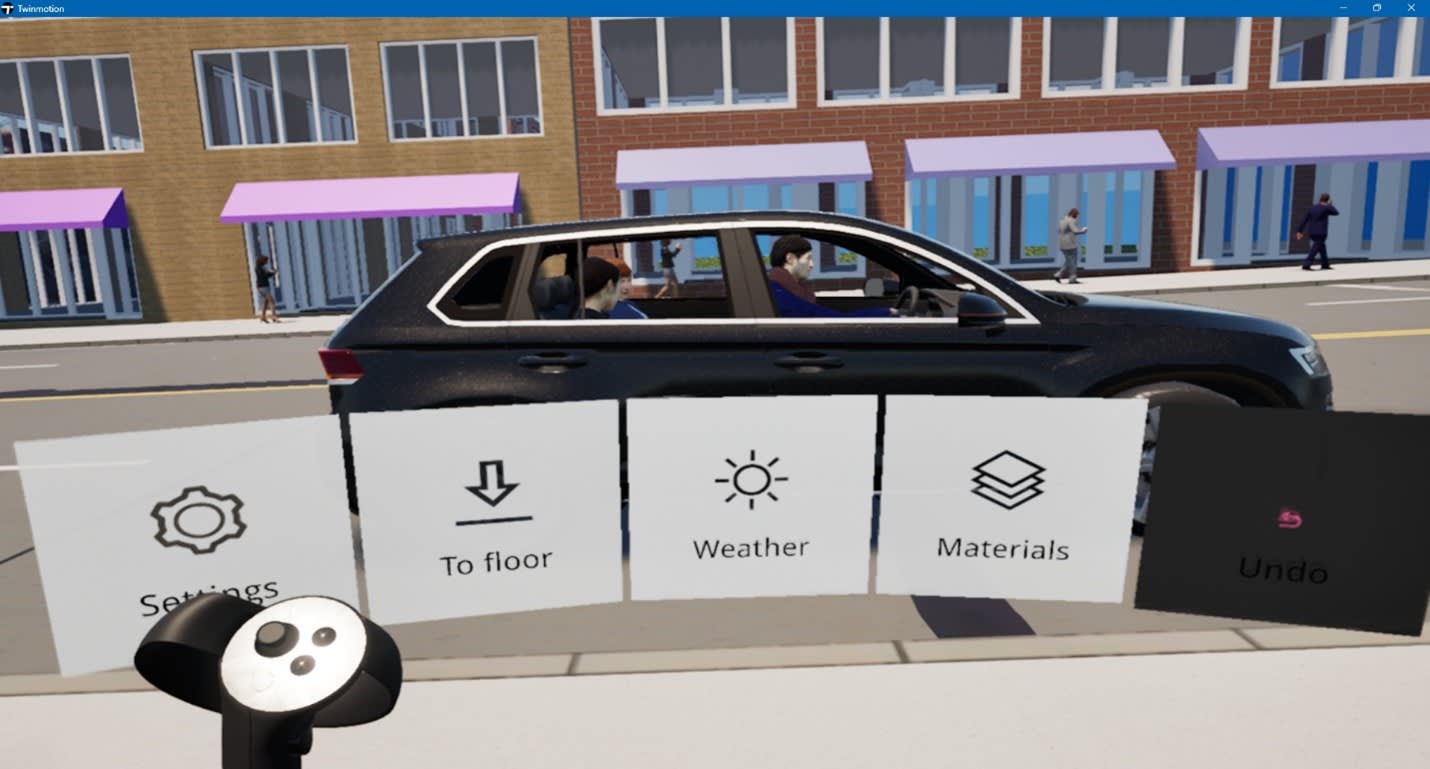
Experience your scene immersively in virtual reality
VR provides an immersive experience as you inspect your scenarios. This powerful capability puts you right inside the scene to give you a sense of being physically in the environment. To prevent motion sickness, navigation in the VR mode is done by teleportation. Through this mechanism, you can now teleport into buildings. Twinmotion configures your VR system’s controllers to grant you visualization and navigation options. Experiment with these as you explore the scene.
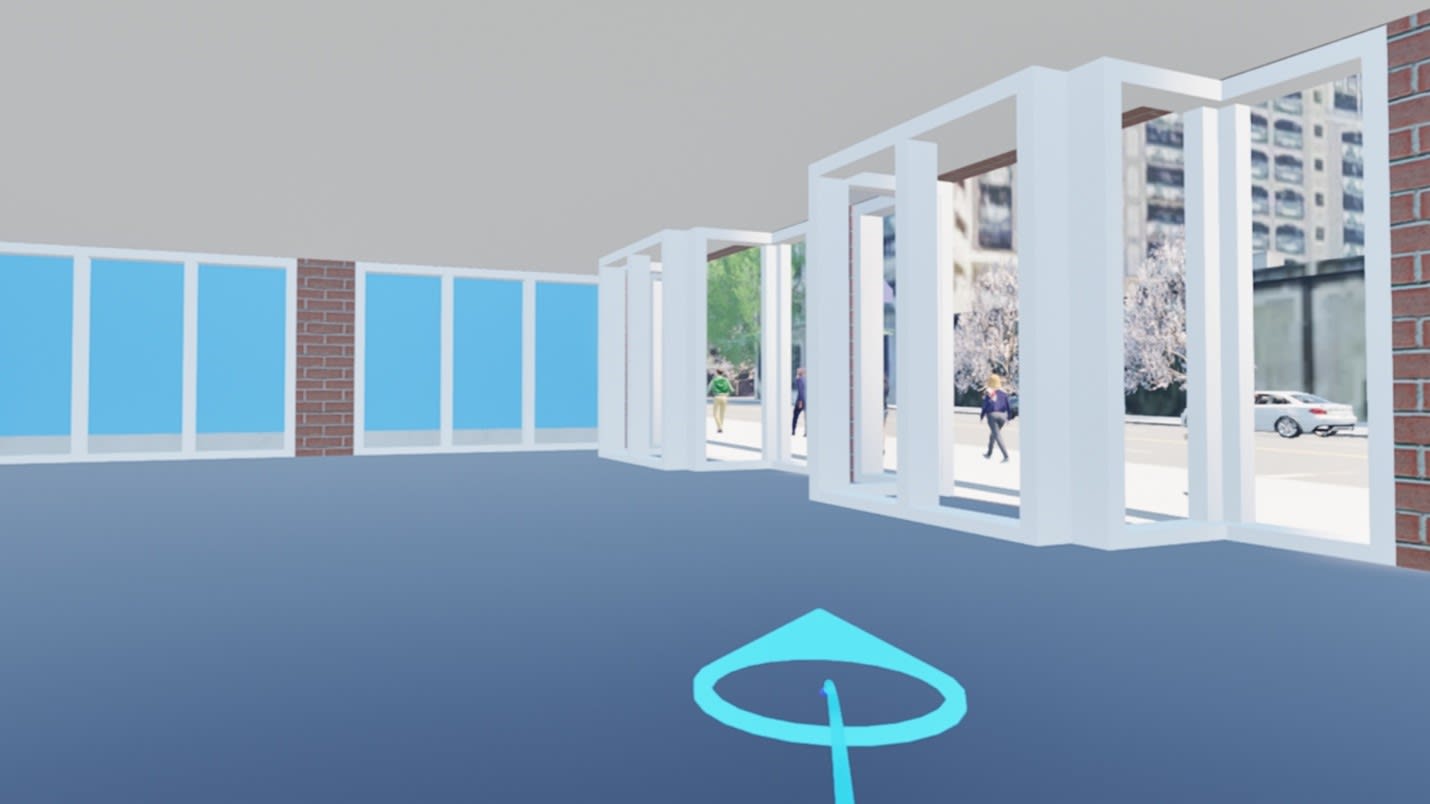
Use teleportation to get around in VR mode
Leverage the power of integration
In this blog I have shown you how the marriage of GIS 3D models and game engines can offer flexible, dynamic and realistic visualizations that can be shared with stakeholders or the public. For the non-developers, bringing ArcGIS CityEngine designs (or ArcGIS Urban plans and projects if you import them in CityEngine first) into Twinmotion is an easy and fun way of utilizing the capabilities of a robust game engine without requiring expertise in programming languages. However, if there is a need to build an app with more advanced tools and options, a developer can leverage the ArcGIS Maps SDKs for Game Engines to bring GIS data into frameworks such as Unreal Engine or Unity for custom development. There are lots of possibilities, so try it out yourself!

Watch your planning scenarios come to life as if you were there