No code, no problem: advanced workflows in ArcGIS Experience Builder
The no code, no problem: advanced workflows in ArcGIS Experience Builder webinar dives deeper into advanced workflows and configurations with ArcGIS Experience Builder. This blog discusses features and functionality available in ArcGIS Experience Builder and building an application that shows those capabilities available to users. To understand the basics of ArcGIS Experience Builder before configuring your application further, check out part one of the no code, no problem webinar series here and part one of the blog series here.
Introduction
ArcGIS Experience Builder is an application available to Esri users through ArcGIS Online and ArcGIS Enterprise. The application uses a drag-and-drop interface, allowing for no code required or minimal code for further customization. Users can utilize this application to create dynamic web applications and pages showcasing their data, maps and other applications to interact with each other.
In this blog, we’ll discuss adding pages and windows, embedding other applications, triggers and actions and using a specific widget. Along our deep dive into ArcGIS Experience Builder, we’ll go through the steps of building an experience displaying dive sites and marinas along Coastal British Columbia and how we can use this data to create an interactive, dynamic and fun application!
Pages
Pages are foundational to creating an ArcGIS Experience Builder application, allowing users to decide between a single or multi-page application. There are various page types to choose from in three categories: full-screen apps, scrolling pages and links. This functionality can be useful for having simple applications with one page that showcases all the data, maps and widgets in one space. On the contrary, users can create a more complex experience by having multiple pages which each specialize in different data or widgets.
Full-screen pages are preferential for having all the content visible on one screen, without the need for scrolling up and down or sideways. Whereas, scrolling pages allow users to expand the content on a page with scrolling functionality. The third type of page is links where a URL to another website can be added. In an ArcGIS Experience Builder application, navigating between different pages can be done using a Menu widget. This widget can be added anywhere on the application and configured to one’s preferences.
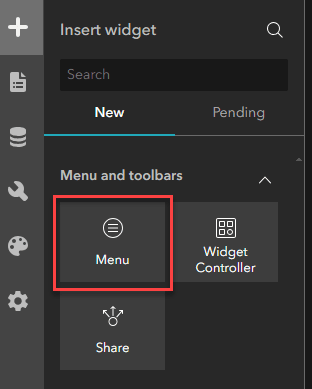
Menu widget outlined in the Insert Widget tab of ArcGIS Experience Builder edit mode.
Use cases
-
You want to create a mapcentric app on one full-screen page with a header.
-
You want to create a multi-page app with a full-screen app on the home page and a scrolling page with supported content on another page that users can access from a menu or button.
Check out the following Geosnap for a more detailed tutorial on creating pages:
Windows
In addition to pages, windows are another functionality that can be added to an ArcGIS Experience Builder application to provide more context about the data, share tooltips, provide disclaimers and more.
There are two categories of windows: fixed and anchored. Fixed windows are incorporated into the application at fixed positions. The two types of fixed windows are fixed blocker and fixed passthrough. A fixed blocker window blocks the application until a user exits out of it, meaning the user is unable to explore the application until the window is gone. Whereas a fixed passthrough window opens in parallel with the application where users can view both the window and application simultaneously. Anchored windows are incorporated into the application for linking a window with a widget, allowing the user to select an image or button widget and a window will appear with further information.
An application can have as many windows as desired, however, there is a unique type of window which applications can have only one. This window is a splash screen and falls under the fixed blocker window type. Splash windows are a fixed window that appears upon opening an application and must be exited out of to explore the experience.
Use cases
-
Anchored windows: you want to provide users with a more in-depth explanation of how to use a widget by linking a window with a button next to the widget.
-
Fixed blocker windows: you can include a disclaimer and information about the application prior to users exploring around by including a splash window.
-
Fixed passthrough windows: you want to provide links and information about the data being used in the application by adding a footnote at the bottom of the page.
Check out the following demo on adding a tooltip window to provide additional information on how to use the Basemap widget:

Embedded Apps
Now that we’ve got the basis of our ArcGIS Experience Builder application completed, we can focus on some interactive functionality, including embedding other applications into an application. Through the Insert widget tab, we can search for the Embed widget and drag it into our experience. Content can be added with the Embed widget through either a URL or HTML (iframe) code in the settings pane. There are several apps from ArcGIS Online that can be embedded including StoryMaps, Instant Apps, Dashboards and Web AppBuilder.
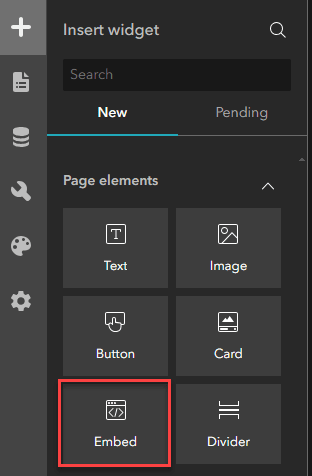
Embed widget outlined in the Insert Widget tab of ArcGIS Experience Builder edit mode.
Use cases
-
Need to put additional information from a website/link social media platforms.
-
Want to embed other applications such as an ArcGIS Dashboard.
-
Can embed content using HTML code.
-
Can integrate/embed a Survey123 app using the Survey widget.
-
Can integrate old Web AppBuilder applications into ArcGIS Experience Builder.
Check out the following Geosnap for a more detailed tutorial on embedding applications:
Triggers and actions
Triggers and actions allow widgets in an ArcGIS Experience Builder application to interact with each other and with the data itself. There are three functionalities that triggers and actions allow:
-
Connecting widgets to data with dynamic content.
-
Allowing widgets and the framework (data source) to interact with each other.
-
Creating interconnectedness between individual widgets.
There are two types of actions: message and data actions. Message actions focus on the communication and interactions between individual widgets and maps, whereas data actions are operations that can be performed on the data itself.
The following blog provides a more detailed explanation of triggers and actions.
Use cases
-
When you select an individual feature in a list widget, you would like the map to zoom into the selected feature.
-
When you change the map extent (zoom in or out, pan around), you would like the table widget to filter the features to only show the features visible within the map extent.
Near-Me widget
We’ve almost completed our application and can now further explore a specific widget, the Near-Me widget. The purpose of this widget is to perform an analysis which identifies and examines features located within a set distance from a specified location. There are three types of analyses that can be performed:
-
Locating the feature closest to a specified point.
-
Identifying all features within a defined distance of a specified point.
-
Summarizing numerical data of nearby features using statistics and SQL expressions.
Once the analysis has been completed, the Near-Me widget offers various export options including JSON, CSV, GeoJSON and as an item in your ArcGIS Online account. There is a new export functionality called PDF report which exports the results to a layout containing a title, map, legend and table. Users can either select from pre-configured templates available in ArcGIS Experience Builder or import a custom layout.
Using our marinas data, we might be curious to know how many marinas are located within a set distance of a specified point. We can configure the Near-Me widget settings to fit our specified requirements, run the analysis and watch as the results appear. Below are some important settings to fit the type of results we’d like:
-
Analysis settings under Content tab: ensure that the correct data is selected (Coastal BC Marinas in our case).
-
Search method: specify a location.
-
In the Analysis Settings, select Add Analysis.
-
Specify analysis type between closest feature, proximity and summary: we want all the features within a set distance, so we have selected proximity.
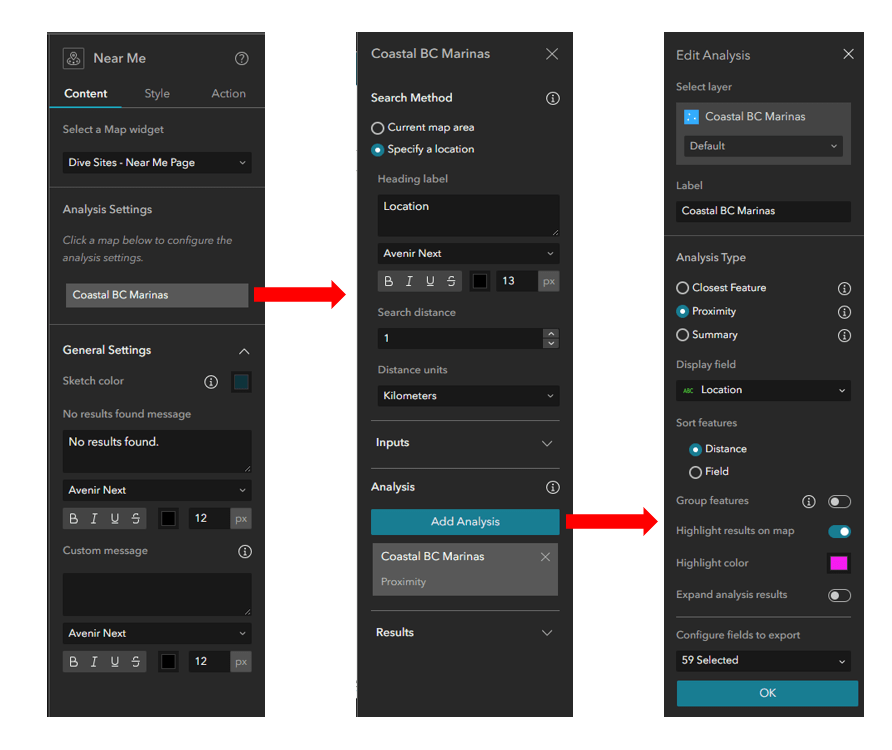
Near-Me Widget configuration in the Near-Me Widget settings pane in ArcGIS Experience Builder edit mode.
All the other settings are entirely up to your preferences and can be explored to see what works best for your analysis. In the demo below, we will see what the Near-Me widget resembles once we run the analysis and export it to that PDF report.
Check out the following demo on using the Near-Me widget in the application and view the results:

Conclusion
ArcGIS Experience Builder is an incredibly versatile application that users can make as straightforward or complex as they’d like. This is lots of features and functionality available when creating an Experience Builder application as touched upon in this blog including pages, windows, triggers and actions, embedding widgets and a look into a specific widget: the Near-Me widget.